

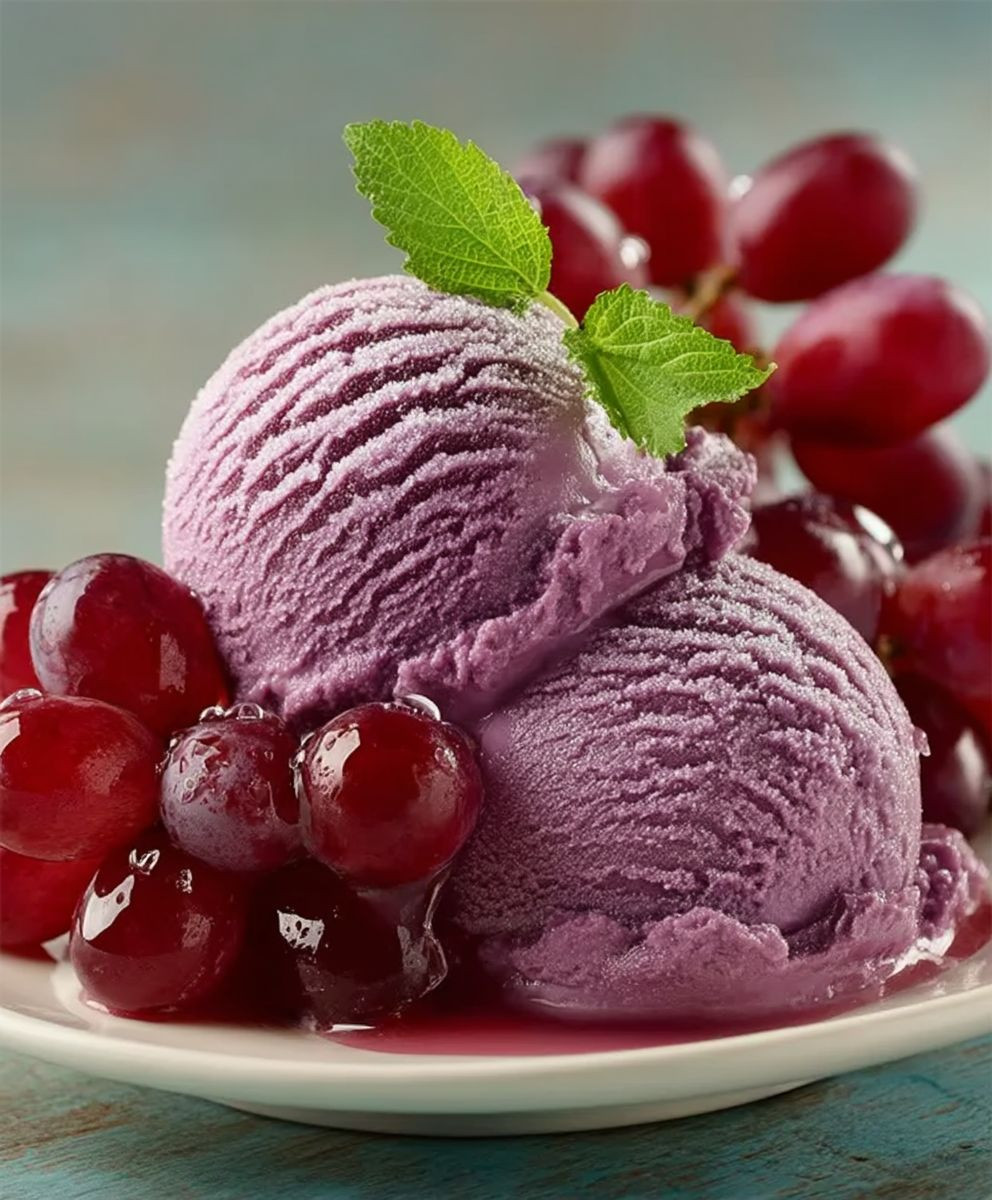
Grape juice ice cream: prepare to be amazed! Imagine a dessert that perfectly captures the vibrant, sweet-tart essence of summer in every single bite. This isn’t your average ice cream; it’s a refreshing, fruity explosion that will tantalize your taste buds and leave you craving more. Forget heavy, overly rich desserts – this is light, invigorating, and surprisingly simple to make.
While the exact origins of grape juice ice cream are a bit hazy, the concept of fruit-based frozen desserts has been around for centuries. From ancient sorbets to modern-day gelato, cultures worldwide have long appreciated the delightful combination of fruit and ice. What makes grape juice ice cream special is its unique flavor profile. The natural sweetness of grapes, combined with a hint of tartness, creates a complex and satisfying taste that’s both familiar and exciting.
People adore this dish for several reasons. First, it’s incredibly easy to prepare, requiring minimal ingredients and equipment. Second, it’s a healthier alternative to traditional ice cream, often lower in fat and calories. But most importantly, it tastes absolutely divine! The smooth, creamy texture, combined with the intense grape flavor, makes it an irresistible treat for both kids and adults. Whether you’re looking for a refreshing dessert on a hot day or a unique way to showcase the deliciousness of grapes, this recipe is sure to become a new favorite.

Ingredients:
- 4 cups (32 ounces) 100% grape juice (Welch’s or similar), chilled
- 1/2 cup granulated sugar (adjust to taste depending on the sweetness of the juice)
- 1/4 cup heavy cream (optional, for a creamier texture)
- 1 tablespoon lemon juice (brightens the flavor)
- Pinch of salt (enhances the sweetness)
- 1 teaspoon vanilla extract (optional, adds depth of flavor)
Preparing the Grape Juice Base:
- First, grab a large pitcher or bowl. This will be our mixing station for the grape juice ice cream base. Make sure it’s clean!
- Pour the chilled grape juice into the pitcher. It’s important that the juice is chilled from the start; this will help the ice cream freeze faster and with smaller ice crystals.
- Now, add the granulated sugar. The amount of sugar you add can be adjusted to your liking. If your grape juice is already very sweet, you might want to start with a little less and taste as you go. Remember, freezing can dull the sweetness, so it’s better to err on the side of slightly sweeter than not sweet enough.
- If you’re opting for a creamier texture (and I highly recommend it!), pour in the heavy cream. The cream adds richness and helps prevent the ice cream from becoming too icy.
- Next, add the lemon juice. Don’t skip this step! The lemon juice brightens the flavor of the grape juice and balances the sweetness. It also helps prevent the ice cream from becoming too cloying.
- Add just a tiny pinch of salt. Salt enhances the sweetness and brings out the other flavors. You won’t taste the salt directly, but it makes a big difference.
- If you’re using vanilla extract, now’s the time to add it. Vanilla adds a subtle depth of flavor that complements the grape juice beautifully.
- Whisk all the ingredients together thoroughly until the sugar is completely dissolved. You shouldn’t see any sugar granules at the bottom of the pitcher. Taste the mixture and adjust the sugar or lemon juice as needed.
- Once you’re happy with the flavor, cover the pitcher and refrigerate the grape juice mixture for at least 2 hours, or preferably overnight. This allows the flavors to meld together and the mixture to chill completely, which is crucial for making smooth ice cream.
Churning the Ice Cream:
- Before you start churning, make sure your ice cream maker bowl is properly frozen. Most ice cream makers require the bowl to be frozen for at least 15-24 hours before use. Check your ice cream maker’s instructions for specific recommendations. A properly frozen bowl is essential for successful ice cream making.
- Take the chilled grape juice mixture out of the refrigerator. Give it a quick stir to ensure everything is still well combined.
- Assemble your ice cream maker according to the manufacturer’s instructions. This usually involves placing the frozen bowl in the machine, attaching the dasher (the part that churns the ice cream), and securing the lid.
- Turn on the ice cream maker.
- Slowly pour the chilled grape juice mixture into the ice cream maker while it’s running. Pouring it in slowly helps prevent the mixture from freezing too quickly and forming large ice crystals.
- Let the ice cream maker churn the mixture for the time recommended by the manufacturer, usually around 20-30 minutes. The ice cream is ready when it has thickened to the consistency of soft-serve ice cream. It should be thick and creamy, but still slightly soft.
- Keep an eye on the ice cream as it churns. The churning time can vary depending on your ice cream maker, the temperature of your ingredients, and the ambient temperature. You’ll know it’s ready when it reaches that soft-serve consistency.
Freezing and Serving:
- Once the ice cream has reached the desired consistency, transfer it to an airtight container. A freezer-safe container with a tight-fitting lid is ideal.
- Gently pack the ice cream into the container, pressing down to remove any air pockets. This will help prevent ice crystals from forming during freezing.
- Place a piece of plastic wrap directly on the surface of the ice cream before putting the lid on. This creates an extra barrier against air and helps prevent freezer burn.
- Seal the container tightly and freeze the ice cream for at least 2-4 hours, or preferably overnight, to allow it to firm up completely. This is called “hardening” the ice cream.
- Before serving, let the ice cream sit at room temperature for a few minutes to soften slightly. This will make it easier to scoop.
- Scoop the grape juice ice cream into bowls or cones and enjoy! You can serve it plain or with your favorite toppings, such as fresh grapes, whipped cream, or a drizzle of chocolate sauce.
- Store any leftover ice cream in the freezer in an airtight container. It’s best to consume it within a week or two for the best quality.
Tips and Variations:
- For a richer flavor: Try using a combination of grape juice and grape concentrate. The concentrate will add a more intense grape flavor.
- For a smoother texture: Add a tablespoon of vodka or other clear alcohol to the grape juice mixture before churning. The alcohol will help prevent ice crystals from forming.
- Add-ins: Get creative with add-ins! Chopped grapes, chocolate chips, or even a swirl of grape jelly would be delicious.
- Vegan option: Substitute the heavy cream with coconut cream for a dairy-free version. Make sure to use full-fat coconut cream for the best results.
- Experiment with different grape varieties: Try using different types of grape juice, such as Concord, Niagara, or red grape juice, to create different flavor profiles.
- Adjust sweetness to your liking: Taste the grape juice mixture before churning and adjust the amount of sugar to your preference. Remember that freezing can dull the sweetness, so it’s better to err on the side of slightly sweeter.
- Don’t over-churn: Over-churning the ice cream can result in a grainy texture. Stop churning when the ice cream has reached the consistency of soft-serve.
- Proper storage is key: Store the ice cream in an airtight container in the freezer to prevent freezer burn and maintain its quality.
Troubleshooting:
- Ice cream is too icy: This can be caused by not chilling the grape juice mixture thoroughly enough before churning, or by not freezing the ice cream maker bowl for long enough. Make sure to follow the instructions carefully.
- Ice cream is too hard: This can be caused by freezing the ice cream for too long. Let it sit at room temperature for a few minutes before serving to soften it slightly.
- Ice cream is grainy: This can be caused by over-churning the ice cream or by using too much sugar. Stop churning when the ice cream has reached the consistency of soft-serve.
- Ice cream is not freezing: This can be caused by not freezing the ice cream maker bowl for long enough, or by using a grape juice mixture that is not cold enough. Make sure to follow the instructions carefully.
Enjoy your homemade grape juice ice cream! It’s a refreshing and delicious treat that’s perfect for any occasion.
Conclusion:
This grape juice ice cream is more than just a frozen treat; it’s a vibrant burst of summer in every spoonful! I truly believe you’ll find yourself reaching for this recipe again and again, not just because it’s incredibly easy to make, but because the flavor is simply irresistible. The natural sweetness of the grape juice shines through, creating a refreshing and satisfying dessert that’s perfect for hot days, casual gatherings, or even just a little self-indulgence. Why is this a must-try? Well, for starters, it requires minimal ingredients and absolutely no fancy equipment. Forget churning for hours or dealing with complicated custard bases. This recipe is all about simplicity and delivering maximum flavor with minimal effort. Plus, it’s a fantastic way to use up any leftover grape juice you might have lurking in your fridge. But beyond the convenience, it’s the taste that truly sets this ice cream apart. It’s light, fruity, and not overly sweet, making it a guilt-free pleasure you can enjoy any time. But the fun doesn’t stop there! This recipe is also incredibly versatile. Feel free to experiment with different types of grape juice. A concord grape juice will give you a richer, more intense flavor, while a white grape juice will result in a lighter, more delicate ice cream. You could even try blending different juices together to create your own unique flavor profile. Looking for serving suggestions? I love to serve this ice cream in a waffle cone for a classic treat. It’s also delicious served in a bowl topped with fresh berries, a drizzle of honey, or a sprinkle of chopped nuts. For a more sophisticated presentation, try scooping it into martini glasses and garnishing with a sprig of mint. And if you’re feeling adventurous, you could even use it as a base for a grape juice ice cream float! Simply pour some sparkling water or ginger ale over a scoop of ice cream for a refreshing and bubbly drink. Here are a few variations to consider: * Grape Juice Ice Cream with Yogurt: For a tangier and creamier ice cream, substitute half of the grape juice with plain Greek yogurt. This will also add a boost of protein! * Grape Juice Ice Cream with Lemon: A squeeze of fresh lemon juice will brighten the flavor and add a touch of acidity that complements the sweetness of the grapes perfectly. * Grape Juice Ice Cream with Mint: Infuse the grape juice with fresh mint leaves before freezing for a refreshing and aromatic twist. * Grape Juice Ice Cream Popsicles: Pour the mixture into popsicle molds and freeze for a fun and easy treat that’s perfect for kids. I’m so excited for you to try this recipe and experience the deliciousness of homemade grape juice ice cream for yourself. It’s a simple, satisfying, and endlessly customizable dessert that’s sure to become a new favorite. So, what are you waiting for? Head to your kitchen, gather your ingredients, and get ready to create some frozen magic! And when you do, please don’t hesitate to share your experience with me. I’d love to hear what you think of the recipe, what variations you tried, and how you served it. You can leave a comment below, tag me on social media, or even send me an email. I can’t wait to see your creations! Happy scooping! Print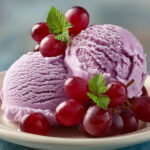
Grape Juice Ice Cream: The Ultimate Refreshing Summer Treat
- Total Time: 150 minutes
- Yield: 4 cups 1x
Description
Refreshing and easy homemade grape juice ice cream! A simple and delicious treat perfect for hot days.
Ingredients
- 4 cups (32 ounces) 100% grape juice (Welch’s or similar), chilled
- 1/2 cup granulated sugar (adjust to taste depending on the sweetness of the juice)
- 1/4 cup heavy cream (optional, for a creamier texture)
- 1 tablespoon lemon juice (brightens the flavor)
- Pinch of salt (enhances the sweetness)
- 1 teaspoon vanilla extract (optional, adds depth of flavor)
Instructions
- In a large pitcher or bowl, pour in the chilled grape juice. Add the granulated sugar, heavy cream (if using), lemon juice, salt, and vanilla extract (if using).
- Whisk all ingredients together thoroughly until the sugar is completely dissolved. Taste and adjust sugar or lemon juice as needed.
- Cover the pitcher and refrigerate the grape juice mixture for at least 2 hours, or preferably overnight.
- Ensure your ice cream maker bowl is properly frozen (at least 15-24 hours).
- Take the chilled grape juice mixture out of the refrigerator and stir.
- Assemble your ice cream maker according to the manufacturer’s instructions.
- Turn on the ice cream maker.
- Slowly pour the chilled grape juice mixture into the ice cream maker while it’s running.
- Let the ice cream maker churn the mixture for the time recommended by the manufacturer, usually around 20-30 minutes, until it reaches the consistency of soft-serve ice cream.
- Transfer the ice cream to an airtight container.
- Gently pack the ice cream into the container, pressing down to remove any air pockets.
- Place a piece of plastic wrap directly on the surface of the ice cream before putting the lid on.
- Seal the container tightly and freeze the ice cream for at least 2-4 hours, or preferably overnight, to allow it to firm up completely.
- Before serving, let the ice cream sit at room temperature for a few minutes to soften slightly.
- Scoop the grape juice ice cream into bowls or cones and enjoy!
Notes
- For a richer flavor: Try using a combination of grape juice and grape concentrate.
- For a smoother texture: Add a tablespoon of vodka or other clear alcohol to the grape juice mixture before churning.
- Add-ins: Get creative with add-ins! Chopped grapes, chocolate chips, or even a swirl of grape jelly would be delicious.
- Vegan option: Substitute the heavy cream with coconut cream for a dairy-free version. Make sure to use full-fat coconut cream for the best results.
- Experiment with different grape varieties: Try using different types of grape juice, such as Concord, Niagara, or red grape juice, to create different flavor profiles.
- Adjust sweetness to your liking: Taste the grape juice mixture before churning and adjust the amount of sugar to your preference. Remember that freezing can dull the sweetness, so it’s better to err on the side of slightly sweeter.
- Don’t over-churn: Over-churning the ice cream can result in a grainy texture. Stop churning when the ice cream has reached the consistency of soft-serve.
- Proper storage is key: Store the ice cream in an airtight container in the freezer to prevent freezer burn and maintain its quality.
- Prep Time: 10 minutes
- Cook Time: 20 minutes
Leave a Comment