

Chocolate milkshake: just the name conjures up images of retro diners, carefree summer days, and that first, blissful sip of creamy, chocolatey goodness. But forget those powdered mixes and overly sweet concoctions! We’re about to embark on a journey to create the ultimate homemade chocolate milkshake, a recipe so decadent and delicious, it will redefine your understanding of this classic treat.
The humble milkshake, believed to have originated in the late 19th century, has evolved from a simple whiskey-spiked beverage to the sweet, blended delight we know and love today. The addition of chocolate, of course, elevated it to legendary status. It’s a drink that transcends generations, a comforting indulgence that brings a smile to faces of all ages.
What is it about a chocolate milkshake that makes it so irresistible? Perhaps it’s the perfect balance of rich chocolate flavor and smooth, creamy texture. Maybe it’s the sheer convenience – a quick and satisfying treat that can be whipped up in minutes. Or perhaps it’s simply the nostalgia, the memories of childhood and simpler times that each sip evokes. Whatever the reason, this recipe promises to deliver a chocolate milkshake experience that is both familiar and extraordinary. Get ready to indulge!

Ingredients:
- 2 cups vanilla ice cream, softened slightly
- 1/2 cup whole milk (or more, to desired consistency)
- 1/4 cup chocolate syrup (high-quality recommended)
- 2 tablespoons unsweetened cocoa powder
- 1 teaspoon vanilla extract
- Pinch of salt
- Optional toppings: Whipped cream, chocolate shavings, maraschino cherries, chocolate sprinkles
Preparing the Chocolate Base:
Before we even think about blending, let’s get our chocolate flavor boosted! This step is crucial for a rich, decadent milkshake that doesn’t just taste like vanilla ice cream with a hint of chocolate.
- Measure the Cocoa Powder: Carefully measure out 2 tablespoons of unsweetened cocoa powder. I prefer using Dutch-processed cocoa for a smoother, less bitter flavor, but regular cocoa powder works just fine.
- Combine with Milk: In a small bowl or measuring cup, combine the cocoa powder with about 2 tablespoons of the whole milk. We’re creating a slurry here, which helps the cocoa powder dissolve evenly and prevents it from clumping in the milkshake.
- Whisk Until Smooth: Whisk the cocoa powder and milk together vigorously until you have a smooth, chocolatey paste. There should be no lumps remaining. If it’s too thick, add a tiny bit more milk, a teaspoon at a time, until you reach the desired consistency.
- Add Chocolate Syrup: Now, add the 1/4 cup of chocolate syrup to the cocoa mixture. I highly recommend using a good quality chocolate syrup for the best flavor. The cheap stuff can sometimes taste artificial.
- Mix Thoroughly: Stir the chocolate syrup and cocoa mixture together until they are completely combined and you have a rich, dark chocolate base. Set this aside for now.
Blending the Milkshake:
This is where the magic happens! The key to a perfect milkshake is finding the right balance between thickness and drinkability. We want it thick enough to hold its shape, but not so thick that it’s impossible to sip through a straw.
- Soften the Ice Cream: Make sure your vanilla ice cream is slightly softened. If it’s rock hard straight from the freezer, it will be difficult to blend and you’ll end up with a milkshake that’s too thick. Let it sit at room temperature for about 5-10 minutes, or until it’s soft enough to scoop easily.
- Add Ice Cream to Blender: Scoop the softened vanilla ice cream into your blender. I find that using a good quality blender makes a huge difference in the final texture of the milkshake.
- Pour in Chocolate Base: Pour the chocolate base you prepared earlier over the ice cream in the blender. Make sure to scrape the bowl or measuring cup to get every last bit of that delicious chocolate flavor!
- Add Remaining Milk: Pour in the remaining whole milk (about 6 tablespoons). Remember, you can always add more milk later if the milkshake is too thick, so it’s better to start with less and adjust as needed.
- Add Vanilla Extract and Salt: Add the 1 teaspoon of vanilla extract and a pinch of salt to the blender. The vanilla enhances the chocolate flavor, and the salt helps to balance the sweetness.
- Blend Until Smooth: Place the lid on the blender and blend on medium speed until the milkshake is smooth and creamy. This usually takes about 30-60 seconds, depending on the power of your blender.
- Check the Consistency: Stop the blender and check the consistency of the milkshake. If it’s too thick, add a little more milk, a tablespoon at a time, and blend again until you reach the desired consistency. If it’s too thin, add a scoop of ice cream and blend again.
Serving and Toppings:
Now for the fun part – serving and adding toppings! This is where you can really get creative and customize your milkshake to your liking.
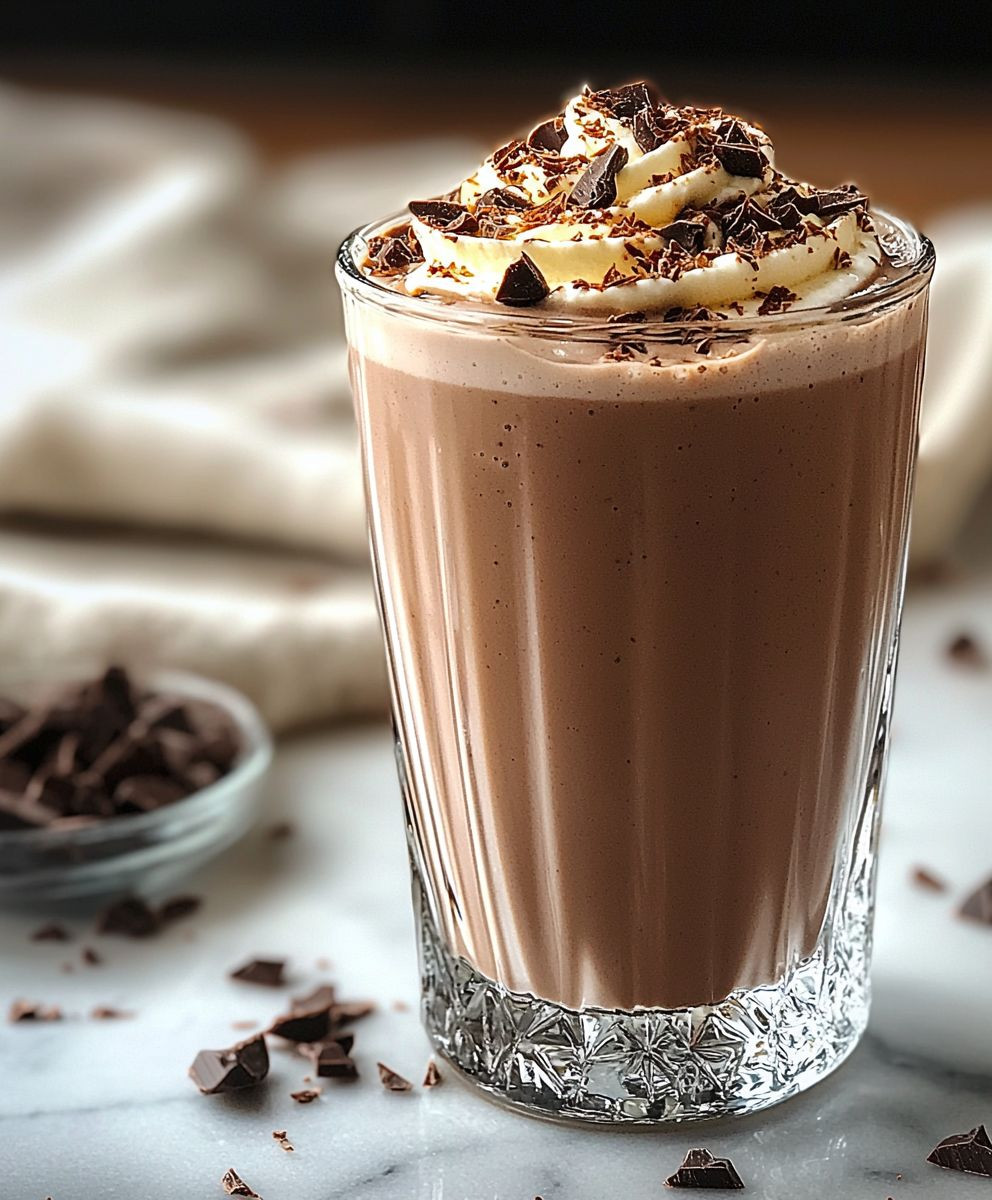
- Pour into Glasses: Pour the milkshake into your favorite glasses. I like to use tall, clear glasses so you can see the beautiful chocolate color.
- Add Whipped Cream (Optional): If you’re a fan of whipped cream, now’s the time to add a generous dollop on top of each milkshake.
- Add Chocolate Shavings (Optional): Sprinkle some chocolate shavings over the whipped cream for an extra touch of chocolatey goodness. You can use a vegetable peeler to create chocolate shavings from a chocolate bar.
- Add Maraschino Cherries (Optional): Top each milkshake with a maraschino cherry for a classic milkshake look.
- Add Chocolate Sprinkles (Optional): Sprinkle some chocolate sprinkles over the whipped cream and cherries for a fun and festive touch.
- Serve Immediately: Serve the milkshakes immediately and enjoy! They’re best when they’re cold and creamy.
Tips and Variations:
Want to take your chocolate milkshake to the next level? Here are a few tips and variations to try:
- Use Different Flavors of Ice Cream: Experiment with different flavors of ice cream, such as chocolate, cookies and cream, or mint chocolate chip.
- Add Peanut Butter: Add a tablespoon or two of peanut butter to the blender for a delicious peanut butter chocolate milkshake.
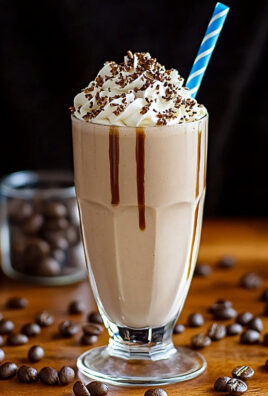
- Add Coffee: Add a shot of espresso or a tablespoon of instant coffee to the blender for a mocha milkshake.
- Add Malt Powder: Add a tablespoon of malt powder to the blender for a classic malted milkshake.
- Make it Vegan: Use vegan ice cream and plant-based milk to make a vegan chocolate milkshake.
- Get Creative with Toppings: Don’t be afraid to get creative with your toppings! Try adding crushed Oreos, chopped nuts, caramel sauce, or even a drizzle of hot fudge.
Troubleshooting:
Sometimes things don’t go exactly as planned. Here’s how to fix some common milkshake problems:
- Milkshake is Too Thick: Add more milk, a tablespoon at a time, and blend until you reach the desired consistency.
- Milkshake is Too Thin: Add a scoop of ice cream and blend until you reach the desired consistency.
- Milkshake is Not Chocolatey Enough: Add more chocolate syrup or cocoa powder, a little at a time, and blend until you reach the desired flavor.
- Milkshake is Too Sweet: Add a pinch of salt or a squeeze of lemon juice to balance the sweetness.
Equipment:
Here’s a list of the equipment you’ll need to make this chocolate milkshake:
- Blender
- Measuring cups and spoons
- Small bowl or measuring cup
- Whisk
- Glasses for serving
Storage:
Milkshakes are best enjoyed immediately, but if you have leftovers, you can store them in the freezer for up to a few hours. However, the texture will change, and it may become icy. To enjoy later, let it thaw slightly and blend again before serving.
Nutritional Information (Approximate):
Please note that the nutritional information is an estimate and may vary depending on the specific ingredients you use.
- Calories: Approximately 400-500 per serving
- Fat: Approximately 20-30 grams
- Sugar: Approximately 40-50 grams
Enjoy your delicious homemade chocolate milkshake!
Conclusion:
So there you have it! This isn’t just any chocolate milkshake recipe; it’s a ticket to pure, unadulterated chocolate bliss. I truly believe this is a must-try recipe because it’s so incredibly simple, yet delivers a flavor explosion that rivals anything you’d get at a fancy ice cream parlor. The rich, creamy texture combined with the intense chocolate flavor is simply irresistible. Forget those watery, flavorless milkshakes – this one is the real deal. But the best part? It’s completely customizable! Feeling adventurous? Try adding a shot of espresso for a mocha twist. A sprinkle of sea salt can really enhance the chocolate notes, creating a sweet and salty sensation that’s utterly addictive. For a more decadent experience, swirl in some peanut butter or Nutella before blending. And if you’re looking for a lighter option, you can substitute the whole milk with almond milk or oat milk – it will still be delicious! Serving suggestions are endless! Of course, it’s perfect on its own as a refreshing treat on a hot day. But why stop there? Pair it with a warm, gooey brownie for the ultimate chocolate indulgence. Or, serve it alongside a plate of crispy french fries for that classic sweet and salty combination. For a more sophisticated presentation, pour it into a chilled glass, top with whipped cream, a drizzle of chocolate syrup, and a few chocolate shavings. You could even add a cherry on top! This chocolate milkshake is also a fantastic base for other desserts. Pour it into popsicle molds and freeze for a refreshing chocolate popsicle. Or, use it as a liquid component in a chocolate cake recipe for an extra moist and flavorful cake. The possibilities are truly endless! I’ve poured my heart and soul into perfecting this recipe, and I’m confident that you’ll love it as much as I do. It’s the perfect treat for kids and adults alike, and it’s guaranteed to put a smile on everyone’s face. It’s quick, easy, and requires minimal ingredients – what’s not to love? I’m so excited for you to try this recipe and experience the joy of a truly amazing chocolate milkshake. Don’t be afraid to experiment with different variations and find your perfect combination. And most importantly, have fun! I would absolutely love to hear about your experience making this chocolate milkshake. Did you try any of the variations I suggested? Did you come up with your own unique twist? Please share your thoughts, comments, and photos in the comments section below. Your feedback is invaluable, and it helps me to continue creating delicious and easy-to-follow recipes that you’ll love. So go ahead, whip up a batch of this incredible chocolate milkshake, and let me know what you think! I can’t wait to hear from you! Happy blending! Print
Chocolate Milkshake: The Ultimate Guide to Creamy Perfection
- Total Time: 7 minutes
- Yield: 1–2 servings 1x
Description
Classic, creamy chocolate milkshake made from scratch. Features a rich chocolate base and customizable toppings for the perfect sweet treat.
Ingredients
- 2 cups vanilla ice cream, softened slightly
- 1/2 cup whole milk (or more, to desired consistency)
- 1/4 cup chocolate syrup (high-quality recommended)
- 2 tablespoons unsweetened cocoa powder
- 1 teaspoon vanilla extract
- Pinch of salt
- Optional toppings: Whipped cream, chocolate shavings, maraschino cherries, chocolate sprinkles
Instructions
- Measure 2 tablespoons of unsweetened cocoa powder into a small bowl.
- Add 2 tablespoons of whole milk to the cocoa powder.
- Whisk vigorously until smooth, creating a chocolatey paste. Add a tiny bit more milk if needed to remove lumps.
- Add 1/4 cup of chocolate syrup to the cocoa mixture.
- Stir until completely combined into a rich, dark chocolate base. Set aside.
- Soften the vanilla ice cream slightly at room temperature for 5-10 minutes.
- Scoop the softened ice cream into a blender.
- Pour the prepared chocolate base over the ice cream.
- Add the remaining whole milk (about 6 tablespoons).
- Add 1 teaspoon of vanilla extract and a pinch of salt.
- Blend on medium speed until smooth and creamy (30-60 seconds).
- Check the consistency. If too thick, add more milk, 1 tablespoon at a time. If too thin, add a scoop of ice cream. Blend until desired consistency is reached.
- Pour the milkshake into glasses.
- Add optional toppings such as whipped cream, chocolate shavings, maraschino cherries, and chocolate sprinkles.
- Serve immediately.
Notes
- For a richer flavor, use Dutch-processed cocoa powder.
- Adjust the amount of milk to achieve your preferred milkshake consistency.
- Experiment with different ice cream flavors, such as chocolate or cookies and cream.
- Try adding peanut butter, coffee, or malt powder for variations.
- For a vegan option, use vegan ice cream and plant-based milk.
- Get creative with toppings like crushed Oreos, chopped nuts, or caramel sauce.
- If the milkshake is too thick, add more milk. If it’s too thin, add more ice cream.
- If it’s not chocolatey enough, add more chocolate syrup or cocoa powder.
- If it’s too sweet, add a pinch of salt or a squeeze of lemon juice.
- Milkshakes are best enjoyed immediately, but leftovers can be stored in the freezer for a few hours. Thaw slightly and blend again before serving.
- Prep Time: 5 minutes
- Cook Time: 1-2 minutes
Leave a Comment