

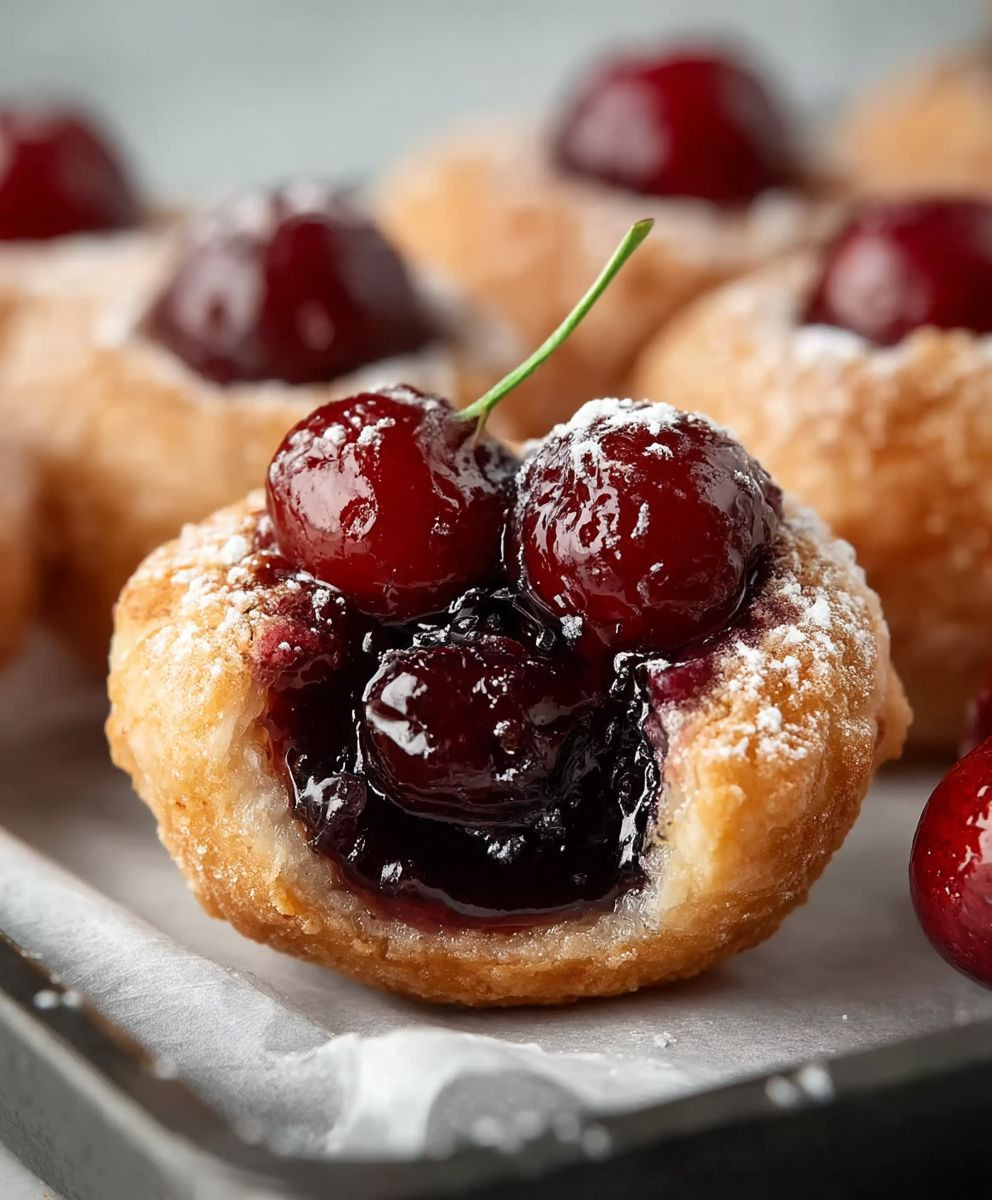
Cherry Pie Bites: Prepare to be utterly captivated by these miniature marvels of deliciousness! Imagine the comforting, warm flavors of a classic cherry pie, perfectly encapsulated in a bite-sized treat. These aren’t just desserts; they’re tiny explosions of sweet and tart cherry goodness, nestled in a flaky, golden crust.
The allure of cherry pie, and by extension, these adorable Cherry Pie Bites, stretches back centuries. Cherries themselves have been cultivated since ancient times, and the tradition of baking them into pies is a cherished part of many cultures, particularly in America. It evokes feelings of home, holidays, and shared moments around the table.
But what makes these little bites so irresistible? It’s the perfect combination of textures and tastes. The sweet, slightly tangy cherry filling bursts in your mouth, complemented by the buttery, crumbly crust that melts away with each chew. They’re incredibly convenient, too! No need to slice and serve; these individual portions are perfect for parties, potlucks, or simply a delightful afternoon snack. Plus, who can resist something so charmingly small and perfectly formed? Get ready to bake up a batch of happiness!

Ingredients:
- For the Crust:
- 2 ½ cups all-purpose flour, plus more for dusting
- 1 teaspoon salt
- 1 cup (2 sticks) unsalted butter, very cold and cut into cubes
- ½ cup vegetable shortening, very cold
- 6-8 tablespoons ice water
- For the Cherry Filling:
- 4 cups fresh or frozen pitted cherries (if frozen, thaw and drain well)
- ¾ cup granulated sugar
- ¼ cup cornstarch
- ¼ cup water
- 1 tablespoon lemon juice
- ½ teaspoon almond extract
- Pinch of salt
- For the Egg Wash & Sprinkle:
- 1 large egg
- 1 tablespoon milk or water
- Turbinado sugar or granulated sugar, for sprinkling
Preparing the Pie Crust:
- Combine Dry Ingredients: In a large bowl, whisk together the flour and salt. This ensures the salt is evenly distributed throughout the dough, which is crucial for flavor and gluten development.
- Cut in the Butter and Shortening: Add the cold, cubed butter and shortening to the flour mixture. Using a pastry blender or your fingertips (work quickly to keep the butter cold!), cut the butter and shortening into the flour until the mixture resembles coarse crumbs. You should still see small pieces of butter and shortening – these are what create flaky layers in the crust. Don’t overmix!
- Add Ice Water: Gradually add the ice water, one tablespoon at a time, mixing gently after each addition. The amount of water you need will vary depending on the humidity and the dryness of your flour. Stop adding water when the dough just comes together and is slightly shaggy. Be careful not to add too much water, as this will make the crust tough.
- Form Dough Disks: Divide the dough in half and gently form each half into a flat disk. Wrap each disk tightly in plastic wrap. Flattening the dough helps it chill more evenly and makes it easier to roll out later.
- Chill the Dough: Refrigerate the dough disks for at least 2 hours, or preferably overnight. This allows the gluten to relax, which will result in a more tender crust. Chilling also firms up the butter and shortening, which is essential for creating flaky layers.
Making the Cherry Filling:
- Combine Filling Ingredients: In a medium saucepan, combine the cherries, sugar, cornstarch, water, lemon juice, almond extract, and salt. The cornstarch acts as a thickener, so don’t skip it! The lemon juice brightens the flavor of the cherries, and the almond extract complements the cherry flavor beautifully.
- Cook the Filling: Cook the mixture over medium heat, stirring constantly, until the cherries release their juices and the mixture thickens. This usually takes about 5-7 minutes. The filling should be thick enough to coat the back of a spoon.
- Cool the Filling: Remove the saucepan from the heat and let the cherry filling cool completely. Cooling the filling prevents it from melting the crust when you assemble the pie bites. You can speed up the cooling process by transferring the filling to a shallow dish.
Assembling the Cherry Pie Bites:
- Preheat Oven and Prepare Baking Sheet: Preheat your oven to 375°F (190°C). Line a baking sheet with parchment paper. This prevents the pie bites from sticking and makes cleanup easier.
- Roll Out the Dough: On a lightly floured surface, roll out one of the chilled dough disks to about 1/8-inch thickness. Use a 2-3 inch round cookie cutter (or a knife) to cut out circles from the dough. Re-roll the scraps to get as many circles as possible.
- Place Dough Circles on Baking Sheet: Place the dough circles on the prepared baking sheet, leaving a little space between each one.
- Add Cherry Filling: Spoon a small amount of the cooled cherry filling (about 1-2 teaspoons) onto the center of each dough circle. Be careful not to overfill, as the filling will bubble over during baking.
- Top with Dough Circles: Roll out the second dough disk and cut out circles as before. Place these circles on top of the filling, gently pressing the edges to seal. You can use a fork to crimp the edges for a decorative touch and to ensure a good seal.
- Cut Slits in the Top: Use a sharp knife to cut a small slit or two in the top of each pie bite. This allows steam to escape during baking, preventing the crust from puffing up too much and potentially bursting.
- Prepare Egg Wash: In a small bowl, whisk together the egg and milk (or water) to create an egg wash.
- Brush with Egg Wash: Brush the tops of the pie bites with the egg wash. This gives them a beautiful golden-brown color and a slight sheen.
- Sprinkle with Sugar: Sprinkle the tops of the pie bites with turbinado sugar or granulated sugar. This adds a touch of sweetness and a nice crunch.
- Bake: Bake in the preheated oven for 20-25 minutes, or until the crust is golden brown and the filling is bubbly. Keep a close eye on them, as baking times can vary depending on your oven.
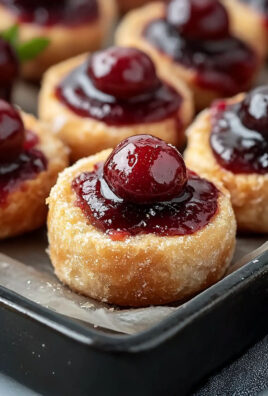
- Cool and Serve: Let the pie bites cool on the baking sheet for a few minutes before transferring them to a wire rack to cool completely. Serve warm or at room temperature. They are delicious on their own or with a scoop of vanilla ice cream!
Tips for Success:
- Keep Ingredients Cold: The key to a flaky pie crust is to keep the butter and shortening as cold as possible. This prevents the fat from melting into the flour, which would result in a tough crust.
- Don’t Overmix the Dough: Overmixing the dough develops the gluten, which can make the crust tough. Mix only until the dough just comes together.
- Chill the Dough: Chilling the dough allows the gluten to relax and the butter and shortening to firm up, which is essential for a tender and flaky crust.
- Use Fresh or Frozen Cherries: You can use either fresh or frozen cherries for the filling. If using frozen cherries, be sure to thaw them completely and drain them well before using.
- Adjust Sugar to Taste: The amount of sugar in the filling can be adjusted to your liking, depending on the sweetness of the cherries.
- Don’t Overfill the Pie Bites: Overfilling the pie bites can cause the filling to bubble over during baking, which can make the crust soggy.
- Crimp the Edges Well: Crimping the edges of the pie bites helps to seal them and prevent the filling from leaking out during baking.
- Let Cool Before Serving: Letting the pie bites cool slightly before serving allows the filling to set up and prevents it from being too runny.
Variations:
- Other Fruit Fillings: You can use this recipe with other fruit fillings, such as apple, blueberry, or peach.
- Different Extracts: Experiment with different extracts, such as vanilla or rum, to add a unique flavor to the filling.
- Add Spices: Add a pinch of cinnamon, nutmeg, or cloves to the filling for a warm and comforting flavor.
- Cheese Crust: For a savory twist, try adding some grated cheese to the pie crust.
- Lattice Top: Instead of a solid top crust, you can create a lattice top for a more decorative look.
Storage Instructions:
- Room Temperature: Cherry pie bites can be stored at room temperature for up to 2 days in an airtight container.
- Refrigerator: For longer storage, store the pie bites in the refrigerator for up to 5 days.
- Freezer: To freeze, wrap the pie bites individually in plastic wrap and then place them in a freezer-safe bag or container. They can be frozen for up to 2 months. Thaw in the refrigerator before serving.
Conclusion:
These Cherry Pie Bites are truly irresistible, and I wholeheartedly believe you need to experience the joy they bring! From the flaky, buttery crust to the sweet and tangy cherry filling, every bite is a little piece of heaven. They’re incredibly easy to make, perfect for any occasion, and guaranteed to be a crowd-pleaser. Seriously, what’s not to love? I know you might be thinking, “Another cherry pie recipe?” But trust me, these aren’t just any cherry pies. The bite-sized format makes them incredibly convenient and fun to eat. They’re perfect for parties, potlucks, or even just a cozy night in. Plus, they’re so much easier to manage than a full-sized pie, especially if you’re new to baking. No more struggling to cut perfect slices! Beyond their ease and deliciousness, these Cherry Pie Bites are incredibly versatile. Want to elevate them even further? Try serving them warm with a scoop of vanilla ice cream or a dollop of whipped cream. The contrast of the warm pie and cold ice cream is simply divine. For a more sophisticated touch, consider drizzling them with a balsamic glaze or a sprinkle of chopped pistachios. And don’t feel limited to just cherry! The beauty of this recipe is that you can easily adapt it to your favorite fruit filling. Apple pie bites, blueberry pie bites, even peach pie bites – the possibilities are endless! Just swap out the cherry filling for your preferred fruit and adjust the spices accordingly. For example, a dash of cinnamon works wonders with apple, while a hint of lemon zest complements blueberries beautifully. If you’re feeling adventurous, you can also experiment with different crusts. While I personally love the classic pie crust recipe I’ve shared, you could also try using puff pastry for an extra flaky and airy texture. Or, for a quicker and easier option, use store-bought pie crust. Just make sure to thaw it properly before using it. I’m so confident that you’ll love these Cherry Pie Bites that I urge you to give them a try. They’re the perfect way to satisfy your sweet tooth without spending hours in the kitchen. Plus, they’re so cute and festive that they’re sure to impress your friends and family. So, what are you waiting for? Gather your ingredients, preheat your oven, and get ready to bake some magic! I promise you won’t regret it. And once you’ve made them, I’d absolutely love to hear about your experience. Did you try any variations? Did you serve them with ice cream or whipped cream? What did your friends and family think? Please, share your photos and stories in the comments below! I’m always eager to see your creations and learn from your experiences. Baking is a journey, and I’m so happy to be sharing this recipe with you. Happy baking, and enjoy your delicious Cherry Pie Bites! I can’t wait to hear all about it. Print
Cherry Pie Bites: The Perfect Mini Dessert Recipe
- Total Time: Creamy, cheesy chicken enchiladas with a flavorful homemade sauce. Perfect for a satisfying weeknight dinner.
- Yield: This recipe features juicy chicken thighs marinated in a flavorful blend of soy sauce, honey, garlic, and ginger, then baked to perfection. Serve over rice or noodles for a quick and delicious meal.
Description
Delicious and easy cherry pie bites with flaky crust and sweet cherry filling. Perfect for parties, snacks, or dessert!
Ingredients
Fluffy, buttery brioche dough swirled with a rich, homemade chocolate hazelnut filling. Perfect for breakfast, brunch, or dessert.
Instructions
This simple and flavorful chicken marinade uses common pantry ingredients to create tender, juicy, and delicious chicken perfect for grilling, baking, or pan-frying.
Notes
A flavorful and comforting Algerian dish featuring tender meat simmered in a rich tomato-based sauce with chickpeas and vegetables. Perfect served with couscous or bread.
- Prep Time: Delicious and easy-to-make [Recipe Name] featuring [Highlight Ingredient]. Perfect for [Occasion/Meal] and ready in [Total Time].
- Cook Time: This recipe features juicy chicken thighs marinated in a flavorful blend of soy sauce, honey, garlic, and ginger, then baked to perfection. Serve over rice or noodles for a quick and delicious meal.

Leave a Comment