

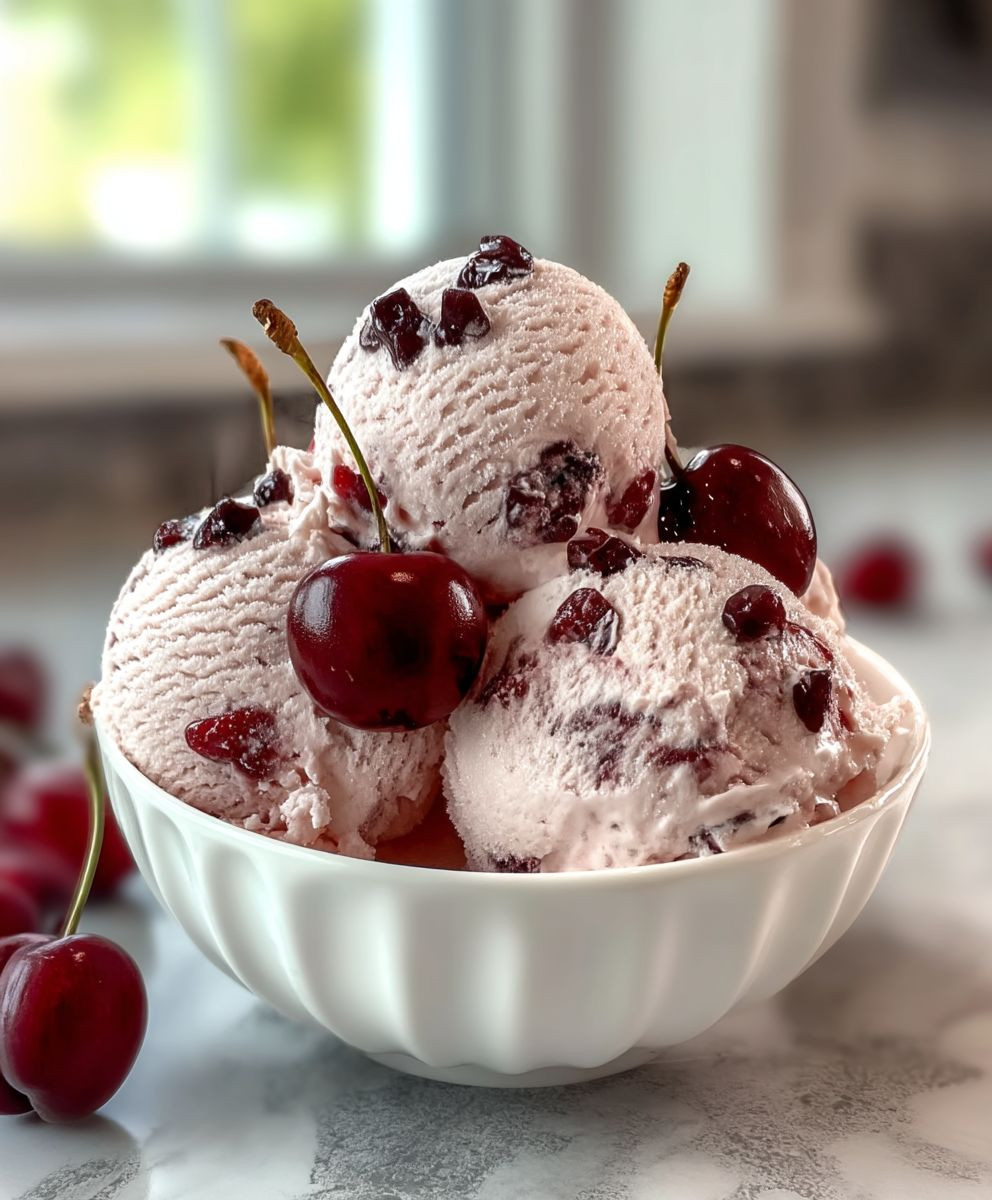
Cherry Garcia Ice Cream: just the name conjures up images of creamy, dreamy deliciousness, doesn’t it? Imagine sinking your spoon into a pint of this iconic flavor, the sweet cherry bursts mingling with the rich chocolate chunks in a symphony of textures and tastes. But what if I told you that you could recreate this magic in your own kitchen, with a homemade version that’s even better than the store-bought kind?
Inspired by the legendary guitarist Jerry Garcia, this flavor was born from a fan’s suggestion to Ben & Jerry’s in the late 1980s. It quickly became a fan favorite, embodying the spirit of fun and indulgence. The combination of sweet cherries and dark chocolate proved irresistible, and Cherry Garcia Ice Cream has remained a beloved classic ever since.
People adore this ice cream for its perfect balance of flavors. The sweetness of the cherries is beautifully offset by the slightly bitter dark chocolate, creating a complex and satisfying taste experience. The creamy texture is incredibly comforting, making it the perfect treat for a hot summer day or a cozy night in. Plus, who can resist the delightful pops of cherry and chocolate in every bite? Get ready to experience the joy of homemade ice cream with this easy-to-follow recipe. You won’t be disappointed!

Ingredients:
- 2 cups heavy cream
- 1 cup whole milk
- ¾ cup granulated sugar
- ¼ teaspoon salt
- 1 teaspoon vanilla extract
- ½ teaspoon almond extract (optional, but highly recommended!)
- 6 ounces bittersweet chocolate, coarsely chopped
- 1 cup fresh or frozen sweet cherries, pitted and halved (or quartered if large)
- 2 tablespoons Kirsch (cherry liqueur), optional
Preparing the Cherry Infusion (Optional, but Enhances Flavor)
This step is optional, but trust me, it elevates the cherry flavor to a whole new level. Infusing the cherries with Kirsch not only intensifies their taste but also helps prevent them from becoming icy in the ice cream.
- Combine Cherries and Kirsch: In a small bowl, gently toss the pitted and halved (or quartered) cherries with the Kirsch. If you’re using frozen cherries, make sure they’re mostly thawed before adding the Kirsch.
- Let it Sit: Cover the bowl with plastic wrap and let the cherries macerate in the Kirsch for at least 30 minutes, or up to a few hours, in the refrigerator. The longer they sit, the more flavorful they become. Stir occasionally.
- Drain (Optional): If you prefer a less intense cherry liqueur flavor, you can drain the cherries before adding them to the ice cream base. Reserve the Kirsch-infused liquid to add to cocktails or other desserts! I usually skip this step because I love the extra kick.
Making the Ice Cream Base
The ice cream base is the foundation of our Cherry Garcia masterpiece. It’s crucial to get this right for a creamy, smooth texture. Don’t be tempted to skip any steps!
- Combine Cream, Milk, Sugar, and Salt: In a medium saucepan, whisk together the heavy cream, whole milk, granulated sugar, and salt. Make sure the sugar is fully dissolved before moving on.
- Heat the Mixture: Place the saucepan over medium heat and cook, stirring constantly, until the mixture is just steaming and the sugar is completely dissolved. You don’t want it to boil! The ideal temperature is around 170-175°F (77-79°C). This step helps the sugar dissolve properly and creates a smoother ice cream.
- Remove from Heat: Take the saucepan off the heat and stir in the vanilla extract and almond extract (if using). The almond extract really complements the cherry and chocolate flavors, so I highly recommend it.
- Chill the Base: This is a crucial step! Pour the ice cream base into a bowl, cover it tightly with plastic wrap (pressing the plastic wrap directly onto the surface of the mixture to prevent a skin from forming), and refrigerate for at least 4 hours, or preferably overnight. The colder the base, the better the ice cream will churn. This allows the flavors to meld together and the mixture to thicken slightly.
Churning the Ice Cream
Now for the fun part! Churning the ice cream is where the magic happens. Make sure your ice cream maker bowl is properly frozen before you start.
- Prepare Your Ice Cream Maker: Follow the manufacturer’s instructions for your ice cream maker. Typically, this involves freezing the bowl for at least 24 hours. A properly frozen bowl is essential for achieving the right consistency.
- Pour in the Base: Once the ice cream maker bowl is ready, pour the chilled ice cream base into the bowl.
- Churn According to Instructions: Turn on the ice cream maker and churn according to the manufacturer’s instructions. This usually takes about 20-25 minutes, or until the ice cream has a soft-serve consistency. Keep an eye on it – you want it to be thick and creamy, but not too hard.
Adding the Chocolate and Cherries
This is where we transform our vanilla ice cream into Cherry Garcia perfection! Timing is key here to ensure the chocolate doesn’t freeze into hard, unyielding chunks.
- Add Chocolate and Cherries: During the last 2-3 minutes of churning, gradually add the chopped bittersweet chocolate and the Kirsch-infused cherries (including any accumulated liquid, if you didn’t drain them). The ice cream maker will help distribute the chocolate and cherries evenly throughout the ice cream.
- Continue Churning: Let the ice cream maker continue churning for the remaining time, allowing the chocolate and cherries to become fully incorporated.
Freezing and Serving
While you could technically eat the ice cream right away (and I won’t judge you if you do!), freezing it for a bit longer will improve its texture and flavor.
- Transfer to a Container: Carefully transfer the churned ice cream to an airtight container. A freezer-safe container with a tight-fitting lid is ideal.
- Freeze for at Least 2 Hours: Place the container in the freezer and freeze for at least 2 hours, or preferably longer, to allow the ice cream to harden to a scoopable consistency. This “hardening” process is important for developing the final texture of the ice cream.
- Serve and Enjoy: Once the ice cream is frozen to your liking, scoop it into bowls or cones and enjoy! Garnish with extra cherries or chocolate shavings, if desired.
Tips for Success:
- Use High-Quality Ingredients: The better the ingredients, the better the ice cream. Opt for high-quality heavy cream, whole milk, and bittersweet chocolate.
- Don’t Overchurn: Overchurning can result in a grainy texture. Stop churning when the ice cream reaches a soft-serve consistency.
- Chill Everything: Make sure your ice cream base and ice cream maker bowl are thoroughly chilled before churning. This will help the ice cream freeze properly and prevent ice crystals from forming.
- Adjust Sweetness to Taste: If you prefer a sweeter ice cream, you can add a little more sugar to the base.
- Experiment with Flavors: Feel free to experiment with different types of chocolate or cherries. You could also add other mix-ins, such as chopped nuts or marshmallows.
- Storage: Store leftover ice cream in an airtight container in the freezer for up to 2 weeks. For optimal texture, let the ice cream soften slightly at room temperature for a few minutes before scooping.
Troubleshooting:
- Ice Cream is Too Icy: This is usually caused by not chilling the base properly or by overchurning. Make sure to chill the base for at least 4 hours, or preferably overnight, and avoid overchurning.
- Ice Cream is Too Hard: This can be caused by freezing the ice cream for too long. Let the ice cream soften slightly at room temperature for a few minutes before scooping.
- Chocolate is Too Hard: Make sure to add the chocolate during the last few minutes of churning so that it doesn’t freeze into hard chunks. You can also use chocolate chips instead of chopped chocolate, as they tend to stay softer.
 Print
Print
Cherry Garcia Ice Cream: A Delicious History and Flavor Guide
- Total Time: Creamy, cheesy baked pasta with a crispy breadcrumb topping. Perfect for a comforting weeknight meal.
- Yield: 1 quart (4 cups)
Description
Rich and creamy homemade Cherry Garcia ice cream with bittersweet chocolate chunks and Kirsch-infused sweet cherries.
Ingredients
Creamy, cheesy baked tortellini with a rich tomato sauce, spinach, and a golden, bubbly topping. Perfect for a comforting weeknight meal.
Instructions
This recipe features juicy chicken thighs marinated in a flavorful blend of soy sauce, honey, garlic, and ginger, then baked to golden perfection. Serve over rice or noodles for a quick and delicious weeknight meal.
Notes
Fluffy, rich red velvet cake with a tangy cream cheese frosting. Perfect for celebrations or a sweet treat.
- Prep Time: Fluffy, moist lemon poppy seed muffins bursting with bright citrus flavor. Perfect for breakfast, brunch, or a sweet treat any time of day.
- Cook Time: This vibrant and flavorful Mediterranean Quinoa Salad is packed with fresh vegetables, herbs, and a zesty lemon vinaigrette. It’s a healthy and delicious meal perfect for lunch, dinner, or a potluck.

Leave a Comment