

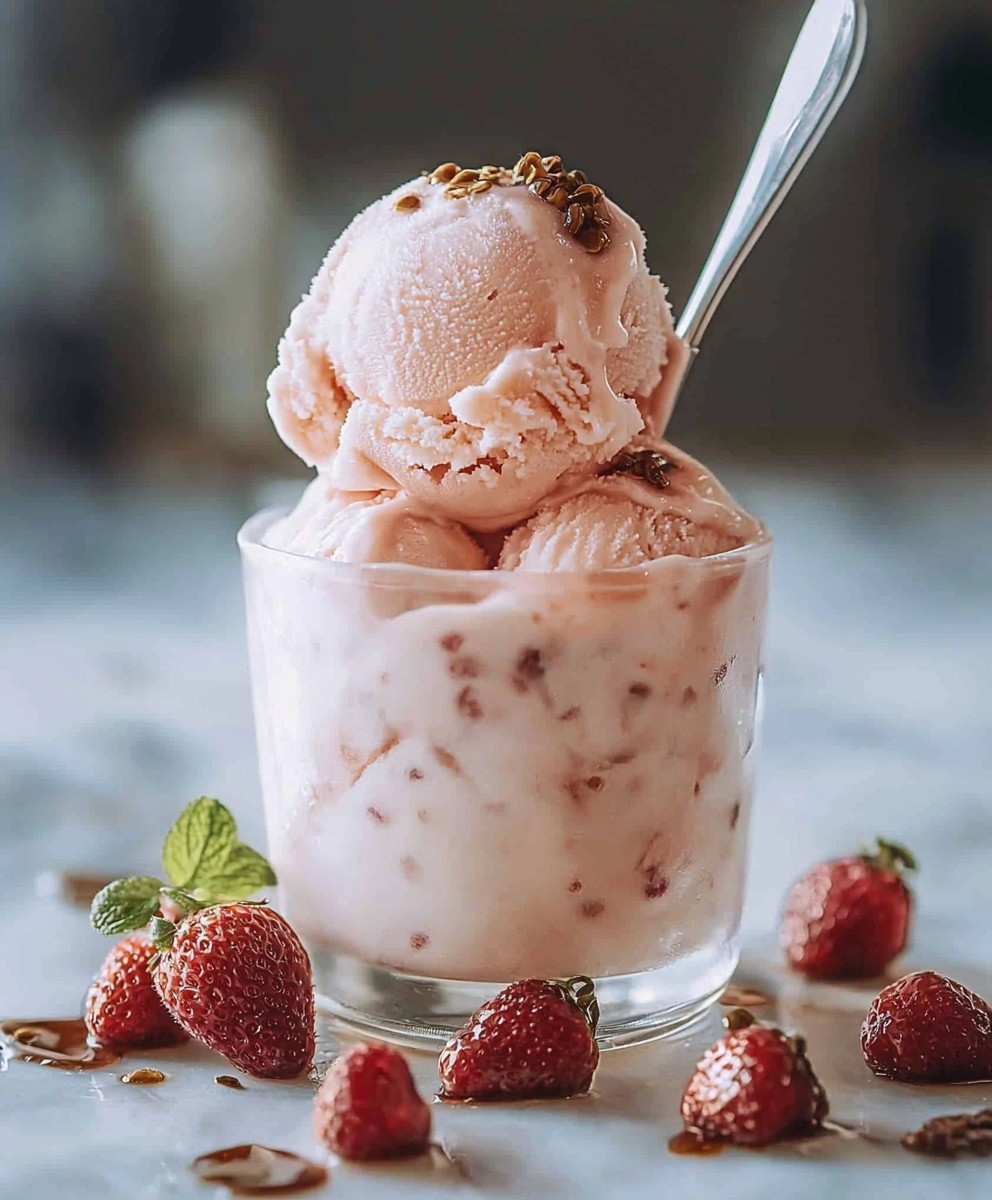
Blender homemade ice cream: the words alone conjure up images of creamy, dreamy deliciousness, don’t they? Forget the fancy ice cream makers and complicated recipes! I’m about to let you in on a little secret: you can whip up incredibly smooth and flavorful ice cream right in your blender, with minimal effort and maximum satisfaction.
While the exact origins of ice cream are debated, frozen desserts have been enjoyed for centuries. From ancient emperors savoring snow flavored with honey and fruit to the modern-day explosion of artisanal ice cream shops, the allure of a cold, sweet treat remains timeless. What makes ice cream so universally loved? Perhaps it’s the comforting texture, the burst of flavor, or the simple joy of indulging in something so purely delightful. Or maybe it’s the memories it evokes – childhood summers, family gatherings, and celebratory moments all often feature a scoop (or two!) of this frozen delight.
This particular recipe for blender homemade ice cream is a game-changer because it’s so incredibly easy. No churning, no special equipment, just a few simple ingredients and your trusty blender. The result is a luxuriously smooth and creamy ice cream that you can customize with your favorite flavors. Get ready to impress your friends and family (and yourself!) with this surprisingly simple and utterly delicious dessert.

Ingredients:
- 2 cups heavy cream, chilled
- 1 (14 ounce) can sweetened condensed milk
- 1 teaspoon vanilla extract
- Pinch of salt
- Optional flavorings: 1/2 cup chocolate chips, 1/2 cup chopped fruit (strawberries, blueberries, bananas), 1/4 cup peanut butter, 2 tablespoons cocoa powder, 1/4 cup crushed cookies
Preparing the Base:
Okay, let’s get started! This blender ice cream recipe is seriously the easiest thing ever. The key is to have your heavy cream nice and cold. I usually pop it in the freezer for about 15-20 minutes before I start, just to get it extra chilly. But don’t let it freeze!
- Chill the Heavy Cream: As I mentioned, make sure your heavy cream is well-chilled. This will help it whip up nicely in the blender.
- Combine Ingredients: In your blender, pour in the chilled heavy cream, sweetened condensed milk, vanilla extract, and a pinch of salt. The salt might seem weird, but trust me, it enhances the sweetness and other flavors.
- Blend Until Thickened: Now, put the lid on your blender and start blending! You’ll want to blend on medium-high speed until the mixture thickens and resembles soft-serve ice cream. This usually takes about 1-3 minutes, but keep an eye on it. You don’t want to over-blend, or it might get too thick. You’re looking for a smooth, creamy consistency.
Adding Your Favorite Flavors:
This is where the fun begins! The base recipe is delicious on its own, but adding your favorite flavors takes it to the next level. Get creative! Here are a few ideas, but feel free to experiment.
- Choose Your Flavorings: Decide what you want to add to your ice cream. Some popular choices include chocolate chips, chopped fruit (strawberries, blueberries, bananas are all great), peanut butter, cocoa powder, crushed cookies, or even a swirl of caramel sauce.
- Incorporate the Flavorings: Once the base is blended, add your chosen flavorings to the blender. If you’re using chocolate chips or chopped fruit, pulse the blender a few times to incorporate them evenly. If you’re using peanut butter or cocoa powder, blend until smooth. Be careful not to over-blend, especially with fruit, as it can make the ice cream watery.
Freezing for the Perfect Consistency:
Alright, we’re almost there! Now it’s time to freeze the ice cream to get that perfect scoopable consistency.
- Transfer to a Freezer-Safe Container: Pour the ice cream mixture into a freezer-safe container. I like to use a loaf pan or a plastic container with a tight-fitting lid.
- Cover and Freeze: Cover the container tightly with a lid or plastic wrap. If using plastic wrap, press it directly onto the surface of the ice cream to prevent ice crystals from forming.
- Freeze for at Least 4-6 Hours: Place the container in the freezer and let it freeze for at least 4-6 hours, or preferably overnight. This will allow the ice cream to firm up completely.
Serving Your Homemade Ice Cream:
The moment we’ve all been waiting for! Time to enjoy your delicious homemade blender ice cream.
- Let it Soften Slightly: Before scooping, let the ice cream sit at room temperature for a few minutes to soften slightly. This will make it easier to scoop.
- Scoop and Serve: Use an ice cream scoop to scoop the ice cream into bowls or cones.
- Add Toppings (Optional): If you’re feeling fancy, add some extra toppings like sprinkles, chocolate sauce, whipped cream, or more of your favorite flavorings.
- Enjoy! Dig in and enjoy your homemade ice cream!
Tips and Tricks for the Best Blender Ice Cream:
Here are a few extra tips to help you make the best blender ice cream possible:
- Use High-Quality Ingredients: The better the quality of your ingredients, the better your ice cream will taste. Use good quality heavy cream and vanilla extract.
- Don’t Over-Blend: Over-blending can cause the ice cream to become too thick or even separate. Blend just until the mixture is smooth and creamy.
- Prevent Ice Crystals: To prevent ice crystals from forming, make sure to cover the ice cream tightly while it’s freezing. Pressing plastic wrap directly onto the surface of the ice cream is a great way to do this.
- Experiment with Flavors: Don’t be afraid to experiment with different flavors! Try adding different fruits, nuts, candies, or extracts to create your own unique ice cream flavors.
- Adjust Sweetness: If you prefer a less sweet ice cream, you can reduce the amount of sweetened condensed milk.
- Storage: Store leftover ice cream in a freezer-safe container in the freezer for up to 2 weeks.
Flavor Variations:
Need some inspiration? Here are a few of my favorite flavor variations:
Chocolate Peanut Butter Ice Cream:
- Add 1/4 cup peanut butter and 2 tablespoons cocoa powder to the base mixture.
Strawberry Cheesecake Ice Cream:
- Add 1/2 cup chopped strawberries and 2 ounces of softened cream cheese to the base mixture.
Cookies and Cream Ice Cream:
- Add 1/2 cup crushed Oreo cookies to the base mixture.
Banana Nut Ice Cream:
- Add 1/2 cup mashed banana and 1/4 cup chopped walnuts to the base mixture.
Mint Chocolate Chip Ice Cream:
- Add 1/2 teaspoon peppermint extract and 1/2 cup mini chocolate chips to the base mixture.
Troubleshooting:
Sometimes things don’t go exactly as planned. Here are a few common issues and how to fix them:
Ice Cream is Too Icy:
- This is usually caused by ice crystals forming. Make sure to cover the ice cream tightly while it’s freezing. You can also try adding a tablespoon of vodka or other alcohol to the mixture, as alcohol helps prevent ice crystals from forming.
Ice Cream is Too Hard:
- This can happen if the ice cream is frozen for too long. Let it sit at room temperature for a few minutes before scooping to soften it up.
Ice Cream is Too Soft:
- This can happen if the ice cream isn’t frozen long enough. Put it back in the freezer for a few more hours.
Ice Cream is Grainy:
- This can be caused by over-blending or using low-quality ingredients. Make sure to use high-quality ingredients and blend just until the mixture is smooth and creamy.
Why This Recipe Works:
This blender ice cream recipe is so successful because it’s incredibly simple and requires no special equipment. The sweetened condensed milk acts as both a sweetener and a stabilizer, preventing ice crystals from forming and creating a smooth, creamy texture. The heavy cream provides the richness and body that makes ice cream so decadent. And the best part? You can customize it with any flavors you like!
Making it Dairy-Free (Alternative):
While this recipe is traditionally made with dairy, you can adapt it for a dairy-free version! Here’s how:
- Substitute Heavy Cream: Use full-fat coconut cream instead of heavy cream. Make sure to chill the coconut cream in the refrigerator overnight. Only use the thick, solid part of the coconut cream, leaving the watery liquid behind.
- Follow the Same Instructions: Follow the same instructions as the original recipe, substituting the coconut cream for heavy cream.
The resulting ice cream will have a slightly coconutty flavor, which can be delicious depending on the flavorings you choose. Consider pairing it with tropical fruits like mango or pineapple.
Nutritional Information (Approximate):
Please note that the nutritional information is an estimate and will vary depending on the specific ingredients and flavorings you use.
- Serving Size: 1/2 cup
- Calories: Approximately 300-400
- Fat: 20-30g
- Saturated Fat: 15-20g
- Total Time: A vibrant and flavorful Mediterranean-inspired orzo salad with sun-dried tomatoes, Kalamata olives, feta cheese, and a zesty lemon-herb vinaigrette. Perfect as a light lunch, side dish, or potluck offering.
- Yield: 6 servings
- Prep Time: This recipe features juicy chicken thighs marinated in a flavorful blend of yogurt, lemon juice, and aromatic spices, then baked to golden-brown perfection. Serve with your favorite sides for a delicious and satisfying meal.
- Cook Time: This easy recipe combines juicy chicken thighs with a flavorful honey-garlic glaze. Simply marinate the chicken, bake until tender, and then broil for a caramelized finish. Serve over rice or with your favorite sides for a delicious and satisfying meal.
Conclusion:
So there you have it! This blender homemade ice cream recipe is truly a game-changer. Forget those complicated ice cream makers and hours of churning. This method is so simple, so quick, and so incredibly delicious, that I guarantee it will become your go-to dessert solution. The creamy texture and intense flavor are simply unmatched, especially considering how little effort it takes. It’s a must-try for anyone who loves ice cream but doesn’t want the fuss. Why is this a must-try? Because it’s accessible to everyone. You don’t need any special equipment beyond a blender – and let’s be honest, most of us have one of those tucked away in a cupboard. It’s also incredibly versatile. The base recipe is a blank canvas, ready for you to unleash your inner ice cream artist. Plus, it’s a fantastic way to use up ripe fruit that might otherwise go to waste. Think about it: perfectly ripe bananas, juicy berries, or even that slightly overripe mango – all transformed into a decadent frozen treat. But the real magic lies in the taste. The blender creates a super smooth and creamy texture that rivals even the most expensive store-bought ice cream. And because you’re using fresh ingredients, the flavor is incredibly vibrant and intense. It’s a taste sensation that will leave you wanting more. Now, let’s talk serving suggestions and variations. The possibilities are truly endless! For a classic treat, serve it in a waffle cone with a sprinkle of your favorite toppings. Chocolate shavings, chopped nuts, or a drizzle of caramel sauce are always a good choice. For a more sophisticated dessert, try serving it in a martini glass with a few fresh berries and a sprig of mint.Serving Suggestions and Variations:
* Fruit Fiesta: Add a mix of your favorite berries – strawberries, blueberries, raspberries – for a burst of fruity flavor. * Chocolate Chunk: Stir in some dark chocolate chunks or mini chocolate chips for a decadent treat. * Nutty Delight: Add a handful of chopped nuts – almonds, walnuts, pecans – for a crunchy texture and nutty flavor. * Coffee Craze: Add a shot of espresso or a tablespoon of instant coffee for a coffee-flavored ice cream. * Mint Chocolate Chip: Add a few drops of peppermint extract and some mini chocolate chips for a refreshing twist. * Salted Caramel: Drizzle with salted caramel sauce for a sweet and salty indulgence. * Vegan Option: Use coconut cream instead of heavy cream for a delicious vegan version. Don’t be afraid to experiment and get creative! Try adding different spices, extracts, or even a splash of your favorite liqueur. The only limit is your imagination. I’m so excited for you to try this recipe and discover the joy of making your own blender homemade ice cream. It’s a fun and rewarding experience that you can share with your family and friends. So, what are you waiting for? Grab your blender, gather your ingredients, and get ready to whip up a batch of the most delicious ice cream you’ve ever tasted. And when you do, please share your experience with me! I’d love to hear what variations you tried and how much you enjoyed it. Leave a comment below or tag me on social media – I can’t wait to see your creations! Happy blending! Print
Blender Homemade Ice Cream: The Easiest Recipe You’ll Ever Make
Description
Delicious homemade ice cream in minutes with a blender! This easy recipe uses simple ingredients and is endlessly customizable with your favorite flavors.
Ingredients
Creamy, cheesy baked tortellini with a rich tomato sauce and a golden, bubbly topping. Perfect for a comforting weeknight meal.
Instructions
Fluffy, golden-brown pancakes infused with the warm spice of cinnamon and the sweetness of apples. Perfect for a cozy breakfast or brunch.
Notes
This recipe features juicy chicken thighs marinated in a flavorful blend of soy sauce, honey, garlic, and ginger, then baked to perfection. Serve over rice or noodles for a quick and delicious meal.


Leave a Comment