

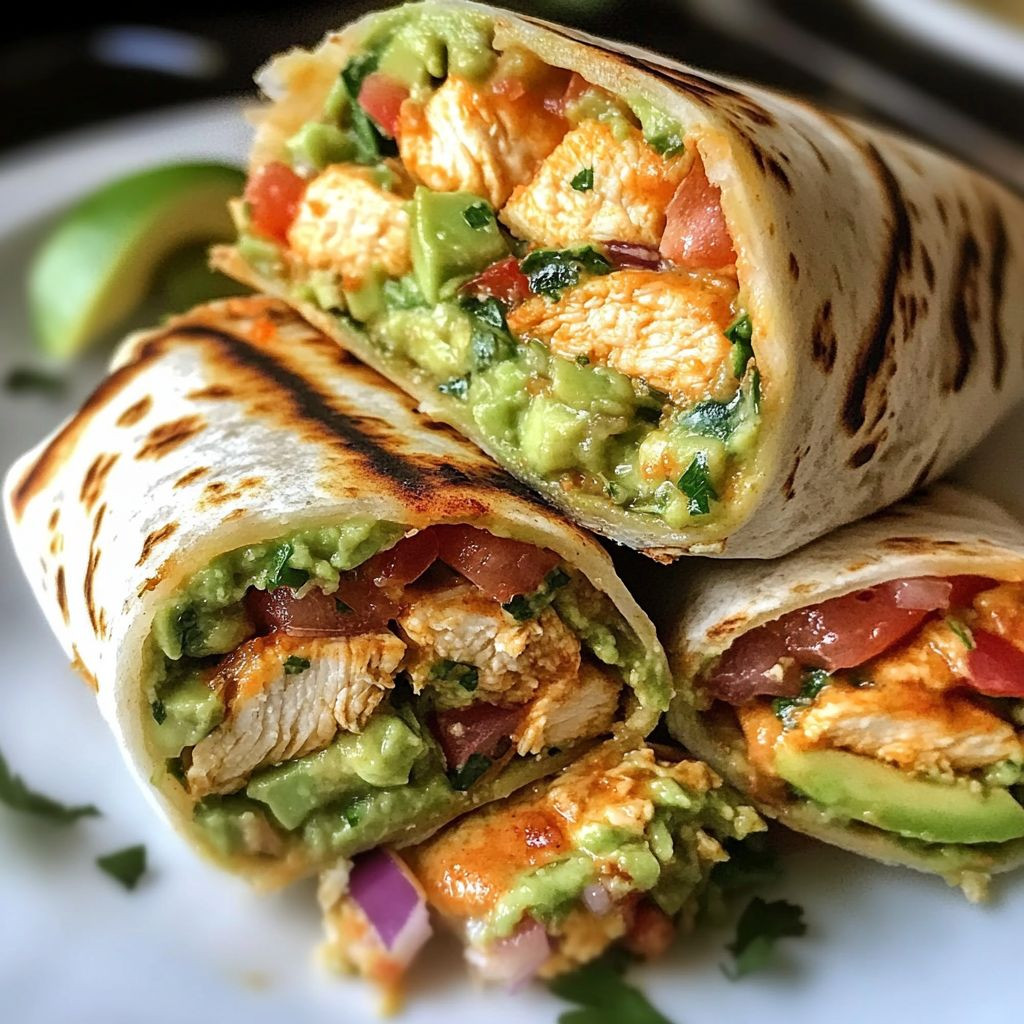
Baked Chicken Chimichangas: Prepare to ditch the drive-through and embrace a fiesta of flavor in your own kitchen! Forget greasy, deep-fried versions – we’re bringing you a healthier, equally delicious twist on this beloved Mexican classic. Imagine biting into a crispy, golden-brown tortilla filled with tender, seasoned chicken, melted cheese, and your favorite toppings. Are you drooling yet?
The chimichanga, a deep-fried burrito, has a somewhat debated origin story, with claims from both Arizona and Sonora, Mexico. Regardless of its exact birthplace, this dish has become a staple in Southwestern cuisine and beyond. It’s a testament to the ingenuity of cooks who transformed a simple burrito into something truly special.
What makes a baked chicken chimichanga so irresistible? It’s the perfect combination of textures – the satisfying crunch of the baked tortilla, the creamy filling, and the burst of freshness from the toppings. Plus, it’s incredibly versatile! You can customize the filling to your liking, making it a crowd-pleaser for even the pickiest eaters. And let’s be honest, who can resist a warm, cheesy, handheld bundle of deliciousness? This baked chicken chimichanga recipe is not only easy to make but also a healthier alternative to the traditional fried version, allowing you to indulge without the guilt. So, gather your ingredients, preheat your oven, and let’s get cooking!

Ingredients:
- 1 tablespoon olive oil
- 1 medium onion, chopped
- 1 green bell pepper, chopped
- 1 red bell pepper, chopped
- 1 pound boneless, skinless chicken breasts, cooked and shredded
- 1 (15 ounce) can black beans, rinsed and drained
- 1 (15 ounce) can corn, drained
- 1 (10 ounce) can diced tomatoes and green chilies, undrained (like Rotel)
- 1 packet taco seasoning
- 1/2 cup shredded cheddar cheese
- 1/2 cup shredded Monterey Jack cheese
- 1/4 cup chopped fresh cilantro
- 8 large flour tortillas
- 1/4 cup melted butter
- Optional toppings: sour cream, guacamole, salsa
Preparing the Chicken Filling
Okay, let’s get started with the heart of our chimichangas – the flavorful chicken filling! This is where we build all those delicious layers of taste that will make your taste buds sing. Trust me, it’s easier than you think!
- Sauté the Vegetables: Heat the olive oil in a large skillet over medium heat. Add the chopped onion, green bell pepper, and red bell pepper. Cook, stirring occasionally, until the vegetables are softened, about 5-7 minutes. You want them to be tender and slightly translucent, not browned. This step is crucial for developing a good base flavor for the entire filling. Don’t rush it!
- Add the Chicken: Now, add the cooked and shredded chicken to the skillet. Make sure the chicken is evenly distributed among the vegetables. I usually shred my chicken with two forks – it’s the easiest and quickest way to do it. You can also use a stand mixer with the paddle attachment on low speed if you’re making a large batch.
- Incorporate the Beans and Corn: Next, add the rinsed and drained black beans and corn to the skillet. Rinsing the black beans is important to remove excess starch and sodium, which can affect the overall flavor and texture of the filling.
- Add the Tomatoes and Green Chilies: Pour in the undrained can of diced tomatoes and green chilies (like Rotel). The liquid from the tomatoes will help to keep the filling moist and flavorful. If you’re sensitive to spice, you can use a mild version of Rotel or substitute with plain diced tomatoes.
- Season with Taco Seasoning: Sprinkle the taco seasoning over the mixture. Stir well to ensure that all the ingredients are evenly coated with the seasoning. This is where the magic happens! The taco seasoning will bring all the flavors together and give the filling that classic chimichanga taste.
- Simmer the Filling: Reduce the heat to low and simmer the filling for about 10-15 minutes, stirring occasionally. This allows the flavors to meld together and the filling to thicken slightly. You want the filling to be moist but not too watery. If it seems too wet, you can simmer it for a few more minutes, uncovered, to allow some of the excess liquid to evaporate.
- Add the Cheese and Cilantro: Remove the skillet from the heat and stir in the shredded cheddar cheese, shredded Monterey Jack cheese, and chopped fresh cilantro. The cheese will melt into the filling, adding a creamy and cheesy element. The cilantro will add a fresh and vibrant flavor that complements the other ingredients perfectly.
- Taste and Adjust: Give the filling a taste and adjust the seasoning as needed. You might want to add a pinch of salt, pepper, or a little extra taco seasoning, depending on your preference. Remember, you can always add more seasoning, but you can’t take it away!
Assembling the Chimichangas
Alright, the filling is ready, and now it’s time to assemble our chimichangas! This is where we transform the filling into those golden-brown, crispy bundles of deliciousness. Don’t be intimidated – it’s all about technique!
- Warm the Tortillas: Lightly warm the flour tortillas in a dry skillet or microwave. This will make them more pliable and easier to roll without tearing. If you’re using a skillet, heat each tortilla for about 10-15 seconds per side. If you’re using a microwave, wrap the tortillas in a damp paper towel and microwave for about 30 seconds.
- Fill the Tortillas: Place a tortilla on a clean surface. Spoon about 1/2 cup of the chicken filling into the center of the tortilla. Be careful not to overfill the tortilla, as this can make it difficult to roll and seal.
- Fold the Sides: Fold in the sides of the tortilla over the filling. This will help to keep the filling from spilling out during baking.
- Roll the Chimichanga: Starting from the bottom edge, tightly roll the tortilla up like a burrito. Make sure to tuck in the filling as you roll to create a tight and secure package.
- Repeat: Repeat steps 2-4 with the remaining tortillas and filling.
Baking the Chimichangas
We’re almost there! Now it’s time to bake our chimichangas to golden-brown perfection. This is where they get that crispy, irresistible texture that we all love.
- Preheat the Oven: Preheat your oven to 375°F (190°C).
- Prepare the Baking Sheet: Lightly grease a baking sheet with cooking spray. This will prevent the chimichangas from sticking to the pan.
- Brush with Melted Butter: Place the assembled chimichangas seam-side down on the prepared baking sheet. Brush the tops of the chimichangas with melted butter. The butter will help them to brown evenly and create a crispy crust.
- Bake: Bake for 20-25 minutes, or until the chimichangas are golden brown and crispy. Keep an eye on them to prevent them from burning. The baking time may vary depending on your oven.
- Cool Slightly: Remove the chimichangas from the oven and let them cool slightly before serving. This will allow the filling to set and prevent you from burning your mouth.
Serving Suggestions
Congratulations, you’ve made delicious baked chicken chimichangas! Now it’s time to enjoy the fruits of your labor. Here are some serving suggestions to take your chimichangas to the next level:
- Toppings: Serve the chimichangas with your favorite toppings, such as sour cream, guacamole, salsa, shredded lettuce, chopped tomatoes, and sliced green onions.
- Sides: Pair the chimichangas with a side of Mexican rice, refried beans, or a simple salad.
- Dipping Sauces: Offer a variety of dipping sauces, such as cheese sauce, ranch dressing, or a spicy chipotle sauce.
- Garnish: Garnish the chimichangas with a sprinkle of fresh cilantro or a dollop of sour cream.
Enjoy your homemade baked chicken chimichangas! They’re perfect for a weeknight dinner, a party, or any occasion where you want to impress your friends and family with a delicious and satisfying meal.
Conclusion:
And there you have it! These Baked Chicken Chimichangas are truly a game-changer for weeknight dinners or weekend gatherings. I know, I know, chimichangas can sometimes seem like a daunting task, but trust me, this baked version is surprisingly simple and delivers all the satisfying flavors and textures you crave, without the extra grease and fuss of frying. What makes this recipe a must-try? First and foremost, it’s the incredible flavor combination. The juicy, seasoned chicken filling, the creamy cheese, and the crispy, golden-brown tortilla create a symphony of deliciousness in every bite. Plus, baking them instead of frying makes them a healthier option, so you can indulge without the guilt. It’s a win-win! But the real magic lies in the versatility of this recipe. Feel free to get creative and customize it to your liking. Want to add some extra heat? Throw in a pinch of cayenne pepper or some chopped jalapeños to the chicken mixture. Craving more veggies? Sauté some bell peppers, onions, or corn and add them to the filling. The possibilities are endless! Serving Suggestions and Variations: These Baked Chicken Chimichangas are fantastic on their own, but they’re even better with some delicious toppings and sides. I personally love serving them with a dollop of sour cream or Greek yogurt, a generous spoonful of guacamole, and a sprinkle of fresh cilantro. A side of Mexican rice and refried beans completes the meal perfectly. Here are a few other serving suggestions to get your creative juices flowing: * Chimichanga Bowls: Instead of rolling the filling into tortillas, simply layer the ingredients in a bowl for a deconstructed chimichanga experience. Start with a base of rice, then add the chicken mixture, cheese, and your favorite toppings. * Chimichanga Salad: Crumble the baked chimichangas over a bed of lettuce and top with your favorite salad fixings, such as tomatoes, onions, avocado, and a zesty dressing. * Breakfast Chimichangas: Scramble some eggs and add them to the chicken mixture for a delicious and hearty breakfast chimichanga. * Spicy Variation: Add a can of diced tomatoes and green chilies (Rotel) to the chicken mixture for a spicier kick. * Vegetarian Option: Substitute the chicken with black beans, pinto beans, or a combination of both for a vegetarian-friendly version. You can also add some roasted vegetables like sweet potatoes or butternut squash for extra flavor and nutrients. I’m confident that you’ll absolutely love these Baked Chicken Chimichangas. They’re easy to make, incredibly flavorful, and perfect for any occasion. So, what are you waiting for? Head to the kitchen and give this recipe a try! I’m so excited to hear what you think! Once you’ve made them, please come back and leave a comment below, letting me know how they turned out. Did you make any variations? What toppings did you use? I’m always looking for new ideas and inspiration. And don’t forget to share your photos on social media using the hashtag #BakedChickenChimichangas so I can see your creations! Happy cooking! I hope you enjoy this delicious and satisfying meal as much as I do. Print
Baked Chicken Chimichangas: A Delicious & Easy Recipe
- Total Time: This recipe features juicy chicken thighs marinated in a flavorful blend of yogurt, lemon juice, and aromatic spices, then baked to golden perfection. Serve with your favorite sides for a complete and satisfying meal.
- Yield: A vibrant and flavorful pasta salad featuring rotini pasta, juicy grilled chicken, crisp vegetables, and a tangy lemon-herb vinaigrette. Perfect for a light lunch, potluck, or summer gathering.
Description
Chicken chimichangas filled with chicken, beans, corn, and cheese. Crispy outside, flavorful inside!
Ingredients
Creamy, cheesy chicken enchiladas with a flavorful homemade sauce. Perfect for a satisfying weeknight dinner.
Instructions
Creamy, cheesy baked tortellini with spinach and ricotta filling, smothered in a rich tomato sauce and topped with mozzarella. Perfect for a comforting weeknight meal.
Notes
A flavorful and comforting Algerian dish featuring tender meat simmered in a rich tomato-based sauce with chickpeas and vegetables. Perfect served over couscous or rice.
- Prep Time: Delicious and easy-to-make [Recipe Name] perfect for [Occasion/Meal]. Features [Highlight key ingredients/flavors].
- Cook Time: Creamy, cheesy baked tortellini with a rich tomato sauce and a golden, bubbly topping. Perfect for a comforting weeknight meal.
Leave a Comment