

Peanut Butter Jelly Cookies are a delightful twist on the classic childhood favorite of peanut butter and jelly sandwiches. As a child, I fondly remember the joy of biting into a gooey, sweet sandwich, and these cookies bring that nostalgia to life in a whole new way. The combination of creamy peanut butter and fruity jelly creates a harmonious blend of flavors that is simply irresistible.
These cookies not only evoke warm memories but also offer a unique texture that is both chewy and slightly crisp on the edges. People love Peanut Butter Jelly Cookies for their convenience; they are easy to whip up and perfect for sharing at gatherings or enjoying as a sweet treat at home. With just a few simple ingredients, you can create a batch that will have everyone asking for seconds. Join me in exploring this delicious recipe that celebrates the timeless pairing of peanut butter and jelly in cookie form!

Ingredients:
- 1 cup creamy peanut butter
- 1 cup granulated sugar
- 1 large egg
- 1 teaspoon vanilla extract
- 1/2 teaspoon baking soda
- 1/4 teaspoon salt
- 1/2 cup jelly or jam (your choice of flavor, such as grape, strawberry, or raspberry)
Preparing the Dough
1. **Preheat the Oven**: Start by preheating your oven to 350°F (175°C). This ensures that your cookies will bake evenly and come out perfectly golden brown. 2. **Mix the Peanut Butter and Sugar**: In a large mixing bowl, combine 1 cup of creamy peanut butter and 1 cup of granulated sugar. Using a hand mixer or a sturdy wooden spoon, mix them together until the mixture is smooth and well combined. This should take about 2-3 minutes. 3. **Add the Egg and Vanilla**: Crack 1 large egg into the bowl and add 1 teaspoon of vanilla extract. Mix again until everything is fully incorporated. The mixture should be creamy and slightly fluffy. 4. **Incorporate Dry Ingredients**: Now, it’s time to add the dry ingredients. Sprinkle in 1/2 teaspoon of baking soda and 1/4 teaspoon of salt. Gently fold these into the mixture using a spatula or wooden spoon until just combined. Be careful not to overmix; you want to keep the dough light and airy.Chilling the Dough
5. **Chill the Dough**: Once your dough is ready, cover the bowl with plastic wrap or a clean kitchen towel. Place it in the refrigerator for about 30 minutes. Chilling the dough helps the cookies maintain their shape while baking and enhances the flavors.Shaping the Cookies
6. **Prepare the Baking Sheet**: While the dough is chilling, line a baking sheet with parchment paper. This prevents the cookies from sticking and makes for easy cleanup. 7. **Form the Cookie Balls**: After 30 minutes, remove the dough from the refrigerator. Using a cookie scoop or your hands, form small balls of dough, about 1 inch in diameter. Place them on the prepared baking sheet, leaving about 2 inches of space between each ball, as they will spread while baking. 8. **Create the Indentations**: Using the back of a teaspoon or your thumb, gently press down in the center of each cookie ball to create a small indentation. This is where the jelly will go, so make sure it’s deep enough to hold a good amount.Filling with Jelly
9. **Add the Jelly**: Spoon about 1/2 teaspoon of your chosen jelly or jam into each indentation. Be careful not to overfill, as the jelly can bubble over while baking.Baking the Cookies
10. **Bake the Cookies**: Place the baking sheet in the preheated oven and bake for 10-12 minutes, or until the edges are lightly golden. The centers may look slightly underbaked, but they will continue to set as they cool. 11. **Cool the Cookies**: Once baked, remove the cookies from the oven and let them cool on the baking sheet for about 5 minutes. This allows them to firm up a bit before transferring them to a wire rack. 12. **Transfer to Wire Rack**: Carefully move the cookies to a wire rack to cool completely. This step is crucial as it prevents the bottoms from becoming soggy.Storing the Cookies
13. **Store the Cookies**: Once the cookies are completely cool, you can store them in an airtight container at room temperature for up to a week. If you want to keep them longer, consider freezing them. Just make sure to separate layers with parchment paper to prevent sticking.Enjoying Your Peanut Butter Jelly Cookies
14. **Serve and Enjoy**: These cookies are perfect for an afternoon snack, a lunchbox treat, or even a dessert. Pair them with a glass of milk or a cup of tea for a delightful experience. 15. **Experiment with Flavors**: Feel free to experiment with different flavors of jelly or jam. You can also add chocolate chips or chopped nuts to the dough for an extra twist. The possibilities are endless! 16. **Share with Friends**: Don’t forget to share these delicious cookies with friends and family. They make a great gift for any occasion, and I guarantee everyone will love them! Now that you have this detailed recipe, I hope you enjoy making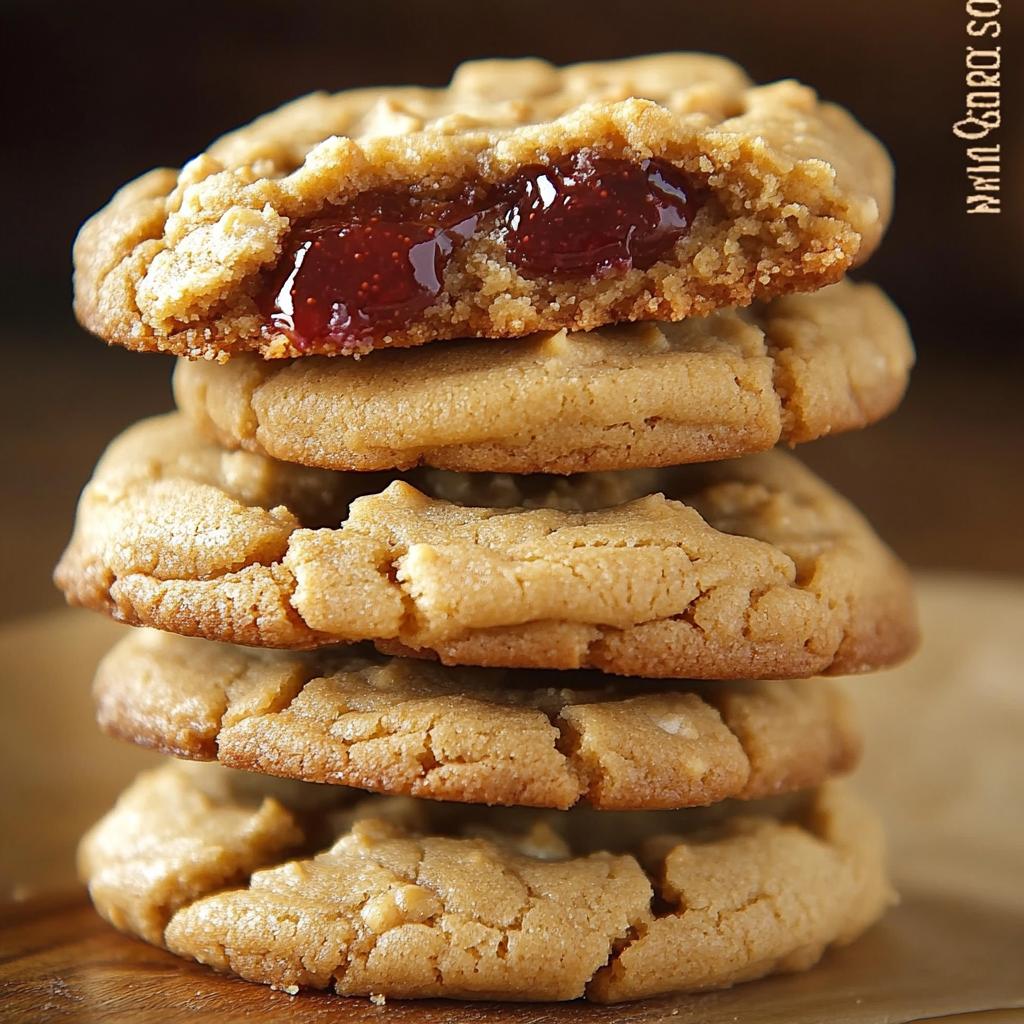
Conclusion:
In summary, these Peanut Butter Jelly Cookies are an absolute must-try for anyone who loves the classic combination of peanut butter and jelly. The delightful blend of flavors and textures creates a nostalgic treat that is perfect for any occasion, whether you’re baking for a family gathering, a school event, or simply indulging in a sweet snack at home. For serving suggestions, I recommend pairing these cookies with a tall glass of cold milk or a warm cup of tea for a comforting experience. You can also experiment with different types of jelly or jam—strawberry, raspberry, or even a zesty orange marmalade can add a unique twist to the traditional recipe. If you’re feeling adventurous, try adding a sprinkle of sea salt on top before baking for an extra layer of flavor that perfectly complements the sweetness. I encourage you to give this Peanut Butter Jelly Cookies recipe a try and share your experience with friends and family. I would love to hear how they turn out for you! Whether you stick to the classic recipe or make your own variations, I’m sure these cookies will become a favorite in your household. Happy baking! Print
Peanut Butter Jelly Cookies: A Delicious Twist on a Classic Treat
- Total Time: 50 minutes
- Yield: 24 cookies 1x
Description
Enjoy the delightful blend of creamy peanut butter and sweet jelly in these soft and chewy Peanut Butter Jelly Cookies. Easy to make and perfect for any occasion, these cookies are sure to satisfy your sweet tooth!
Ingredients
- 1 cup creamy peanut butter
- 1 cup granulated sugar
- 1 large egg
- 1 teaspoon vanilla extract
- 1/2 teaspoon baking soda
- 1/4 teaspoon salt
- 1/2 cup jelly or jam (your choice of flavor)
Instructions
- Preheat your oven to 350°F (175°C).
- In a large mixing bowl, combine the peanut butter and granulated sugar. Mix until smooth and well combined (about 2-3 minutes).
- Crack the egg into the bowl and add the vanilla extract. Mix until fully incorporated.
- Add the baking soda and salt, folding them into the mixture until just combined.
- Cover the bowl with plastic wrap or a kitchen towel and refrigerate for about 30 minutes.
- Line a baking sheet with parchment paper.
- After chilling, form small balls of dough (about 1 inch in diameter) and place them on the prepared baking sheet, leaving 2 inches of space between each.
- Press down in the center of each cookie ball to create a small indentation.
- Spoon about 1/2 teaspoon of jelly or jam into each indentation.
- Bake for 10-12 minutes, or until the edges are lightly golden.
- Let the cookies cool on the baking sheet for about 5 minutes before transferring them to a wire rack.
- Move the cookies to a wire rack to cool completely.
- Store in an airtight container at room temperature for up to a week or freeze for longer storage.
- Enjoy these cookies as a snack or dessert, and feel free to experiment with different flavors of jelly or add chocolate chips or nuts!
Notes
- For a fun twist, try using different flavors of jelly or jam.
- You can also add chocolate chips or chopped nuts to the dough for added texture.
- These cookies make a great gift for friends and family!
- Prep Time: 10 minutes
- Cook Time: 12 minutes


Leave a Comment