

Nun’s Puffs Dessert is a delightful treat that has captured the hearts and taste buds of many. Originating from the kitchens of French nuns, this light and airy pastry has a rich history that dates back centuries. The story goes that these sweet puffs were created as a way to use up leftover ingredients, resulting in a deliciously simple yet elegant dessert that has stood the test of time.
What I love most about Nun’s Puffs Dessert is its incredible texture—crispy on the outside and soft on the inside, each bite is a heavenly experience. The combination of eggs, flour, and cheese creates a unique flavor profile that is both comforting and indulgent. People adore this dish not only for its taste but also for its convenience; it’s easy to whip up and perfect for any occasion, whether it’s a family gathering or a cozy night in. Join me as we explore the delightful world of Nun’s Puffs Dessert and learn how to make this timeless treat in your own kitchen!

Ingredients:
- 1 cup water
- 1/2 cup unsalted butter
- 1 cup all-purpose flour
- 1/4 teaspoon salt
- 4 large eggs
- 1/2 cup granulated sugar
- 1 teaspoon vanilla extract
- 1/2 teaspoon almond extract (optional)
- Powdered sugar for dusting
- Whipped cream for serving (optional)
Preparing the Batter
Let’s get started on making these delightful Nun’s Puffs! The first step is to prepare the batter, which is a simple yet crucial part of the process.
- In a medium saucepan, combine 1 cup of water and 1/2 cup of unsalted butter. Place the saucepan over medium heat and bring the mixture to a gentle boil. Stir occasionally to help the butter melt completely.
- Once the butter has melted and the water is boiling, remove the saucepan from the heat. Quickly add 1 cup of all-purpose flour and 1/4 teaspoon of salt to the saucepan. Stir vigorously with a wooden spoon until the mixture forms a smooth ball and pulls away from the sides of the pan. This should take about 1-2 minutes.
- Let the dough cool for about 5 minutes. This is important because we don’t want to cook the eggs when we add them!
- After the dough has cooled slightly, add 4 large eggs, one at a time, mixing well after each addition. The dough will look a bit lumpy at first, but keep stirring until it becomes smooth and glossy. This is the key to achieving that perfect puff!
- Next, stir in 1/2 cup of granulated sugar, 1 teaspoon of vanilla extract, and if you like, 1/2 teaspoon of almond extract for an extra layer of flavor. Mix until everything is well combined.
Cooking Process
Now that we have our batter ready, it’s time to cook these little puffs to perfection!
- Preheat your oven to 400°F (200°C). This high temperature is essential for creating those beautiful, airy puffs.
- Line a baking sheet with parchment paper. This will prevent the puffs from sticking and make cleanup a breeze.
- Using a pastry bag fitted with a large round tip, or simply a spoon, drop tablespoon-sized mounds of the batter onto the prepared baking sheet. Make sure to leave enough space between each mound, as they will expand while baking.
- Once you’ve piped or spooned out all the batter, place the baking sheet in the preheated oven. Bake for 20-25 minutes, or until the puffs are golden brown and have risen beautifully. Avoid opening the oven door during the first 15 minutes of baking, as this can cause them to deflate.
- After baking, remove the puffs from the oven and let them cool on the baking sheet for a few minutes before transferring them to a wire rack to cool completely.
Assembling the Dessert
Now that our Nun’s Puffs are baked and cooled, it’s time to assemble and serve them!
- Once the puffs are completely cool, you can choose to fill them if you like. A classic way to fill them is with whipped cream. You can either slice the puffs in half and spoon in the whipped cream or use a pastry bag to pipe it directly into the center of each puff.
- If you want to keep it simple, you can serve the puffs as they are, dusted with powdered sugar. To do this, place a fine mesh sieve over the puffs and sprinkle powdered sugar generously over the top.
- For an extra touch, you can serve the Nun’s Puffs with a side of whipped cream or a scoop of ice cream. This adds a delightful creaminess that complements the light and airy texture of the puffs.
- Feel free to get creative with toppings! You can drizzle chocolate sauce, caramel, or even a fruit compote over the puffs for added flavor and presentation.
Serving Suggestions
Nun’s Puffs are best enjoyed fresh
Conclusion:
In summary, Nun’s Puffs Dessert is an absolute must-try for anyone looking to indulge in a delightful treat that combines simplicity with exquisite flavor. The light, airy texture and the sweet, custardy taste make it a perfect dessert for any occasion, whether you’re hosting a dinner party or simply treating yourself after a long day. For serving suggestions, I love to dust them with a sprinkle of powdered sugar or drizzle a bit of chocolate sauce on top for an extra touch of decadence. You can also experiment with variations by adding a hint of vanilla or almond extract to the batter, or even folding in some fresh berries for a fruity twist. The possibilities are endless, and I encourage you to get creative! I genuinely believe that once you try this Nun’s Puffs Dessert, it will quickly become a favorite in your household. So, gather your ingredients, follow the recipe, and dive into this delightful experience. I would love to hear about your adventures in the kitchen, so please share your thoughts and any variations you come up with! Happy baking! Print
Nun’s Puffs Dessert: A Delightful Recipe for a Sweet Treat
- Total Time: 40 minutes
- Yield: 12–15 pieces 1x
Description
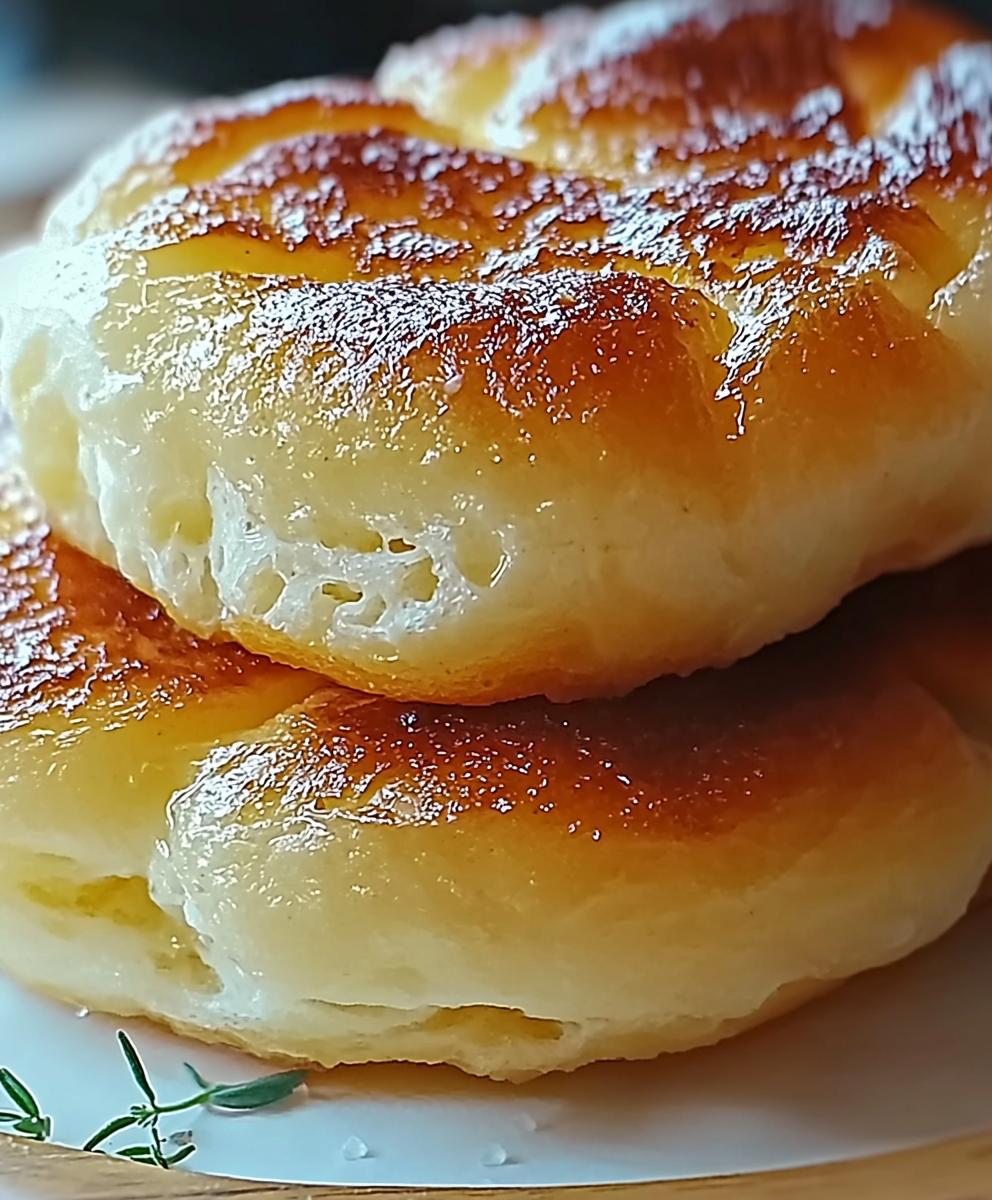
Enjoy the light and airy texture of Nun’s Puffs, a delightful pastry made from choux dough infused with vanilla and almond. These golden treats can be served dusted with powdered sugar or filled with whipped cream, making them a perfect indulgent dessert for any occasion.
Ingredients
- 1 cup water
- 1/2 cup unsalted butter
- 1 cup all-purpose flour
- 1/4 teaspoon salt
- 4 large eggs
- 1/2 cup granulated sugar
- 1 teaspoon vanilla extract
- 1/2 teaspoon almond extract (optional)
- Powdered sugar for dusting
- Whipped cream for serving (optional)
Instructions
- In a medium saucepan, combine 1 cup of water and 1/2 cup of unsalted butter. Place the saucepan over medium heat and bring the mixture to a gentle boil, stirring occasionally to help the butter melt completely.
- Once the butter has melted and the water is boiling, remove the saucepan from the heat. Quickly add 1 cup of all-purpose flour and 1/4 teaspoon of salt. Stir vigorously with a wooden spoon until the mixture forms a smooth ball and pulls away from the sides of the pan (about 1-2 minutes).
- Let the dough cool for about 5 minutes to avoid cooking the eggs when added.
- After cooling slightly, add 4 large eggs one at a time, mixing well after each addition until the dough is smooth and glossy.
- Stir in 1/2 cup of granulated sugar, 1 teaspoon of vanilla extract, and 1/2 teaspoon of almond extract (if using). Mix until well combined.
- Preheat your oven to 400°F (200°C).
- Line a baking sheet with parchment paper.
- Using a pastry bag fitted with a large round tip or a spoon, drop tablespoon-sized mounds of the batter onto the prepared baking sheet, leaving space between each mound.
- Bake for 20-25 minutes, or until the puffs are golden brown and have risen beautifully. Avoid opening the oven door during the first 15 minutes of baking.
- Remove the puffs from the oven and let them cool on the baking sheet for a few minutes before transferring them to a wire rack to cool completely.
- Once the puffs are completely cool, fill them with whipped cream if desired, either by slicing them in half or piping it directly into the center.
- Alternatively, dust the puffs with powdered sugar using a fine mesh sieve.
- Serve with a side of whipped cream or ice cream for added creaminess.
- Get creative with toppings like chocolate sauce, caramel, or fruit compote for extra flavor and presentation.
Notes
- Ensure the dough cools sufficiently before adding eggs to prevent them from cooking.
- For best results, avoid opening the oven door during the initial baking time to maintain puffiness.
- Feel free to experiment with different fillings and toppings to suit your taste!
- Prep Time: 15 minutes
- Cook Time: 25 minutes


Leave a Comment