

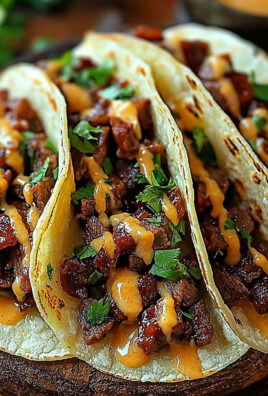
Beef Cheese Chimichangas are a delightful twist on traditional Mexican cuisine that never fails to impress. Imagine biting into a crispy, golden tortilla filled with savory beef, melted cheese, and a medley of spices that dance on your palate. This dish has its roots in the southwestern United States, where it has become a beloved staple, often enjoyed at family gatherings and festive occasions. The combination of textures—from the crunchy exterior to the gooey interior—makes Beef Cheese Chimichangas a favorite among food lovers of all ages.
What truly sets this dish apart is its versatility; you can customize the filling to suit your taste, whether you prefer a spicy kick or a milder flavor. People adore these chimichangas not just for their taste, but also for their convenience—perfect for a quick weeknight dinner or a satisfying snack. Join me as we dive into this mouthwatering recipe that promises to bring a taste of Mexico right to your kitchen!

Ingredients:
- 1 pound ground beef
- 1 cup shredded cheddar cheese
- 1 cup shredded Monterey Jack cheese
- 1 small onion, finely chopped
- 2 cloves garlic, minced
- 1 teaspoon ground cumin
- 1 teaspoon chili powder
- 1/2 teaspoon paprika
- Salt and pepper to taste
- 4 large flour tortillas
- Vegetable oil for frying
- Sour cream, for serving
- Guacamole, for serving
- Salsa, for serving
Preparing the Filling
Let’s start by making the delicious filling for our chimichangas. This is where all the flavor comes together!
- In a large skillet, heat a tablespoon of vegetable oil over medium heat. Once the oil is hot, add the chopped onion and sauté for about 3-4 minutes until it becomes translucent.
- Add the minced garlic to the skillet and cook for an additional 1 minute, stirring frequently to prevent burning.
- Next, add the ground beef to the skillet. Use a spatula to break it up into smaller pieces as it cooks. Cook until the beef is browned and no longer pink, about 5-7 minutes.
- Once the beef is cooked, drain any excess fat from the skillet. This step is important to keep our chimichangas from being too greasy.
- Now, it’s time to season the beef mixture. Sprinkle in the cumin, chili powder, paprika, salt, and pepper. Stir well to combine all the spices with the beef and onion mixture. Let it cook for another 2-3 minutes to allow the flavors to meld together.
- Remove the skillet from heat and stir in the shredded cheddar and Monterey Jack cheeses until they are melted and well incorporated into the beef mixture. This cheesy goodness is what makes these chimichangas irresistible!
Assembling the Chimichangas
Now that we have our filling ready, it’s time to assemble the chimichangas. This part is fun and allows for a little creativity!
- Lay a large flour tortilla on a clean surface or a large plate. Spoon about 1/4 of the beef and cheese mixture into the center of the tortilla.
- Fold the sides of the tortilla over the filling, then roll it up from the bottom to the top, making sure to tuck in the sides as you go. This will help keep the filling secure inside.
- Repeat this process with the remaining tortillas and filling. You should have four nicely rolled chimichangas ready to go!
Cooking the Chimichangas
Now comes the exciting part—frying the chimichangas to golden perfection!
- In a large, deep skillet or a heavy-bottomed pot, pour enough vegetable oil to cover the bottom by about 1 inch. Heat the oil over medium-high heat until it reaches 350°F (175°C). You can test if the oil is ready by dropping a small piece of tortilla into the oil; if it sizzles, you’re good to go!
- Carefully place the chimichangas seam-side down into the hot oil, making sure not to overcrowd the pan. You may need to fry them in batches depending on the size of your skillet.
- Fry the chimichangas for about 3-4 minutes on each side, or until they are golden brown and crispy. Use tongs to carefully turn them over halfway through the cooking time.
- Once they are cooked, remove the chimichangas from the oil and place them on a plate lined with paper towels to drain any excess oil. This will help keep them crispy!
Serving the Chimichangas
Now that our chimichangas are perfectly fried, it’s time to serve them up!
- Place the chimichangas on a serving platter. You can cut them in half diagonally for a nice presentation, or serve them whole.
- Serve with a dollop of sour cream, a generous scoop of guacamole, and a side

Conclusion:
In summary, these Beef Cheese Chimichangas are an absolute must-try for anyone looking to elevate their weeknight dinners or impress guests at a gathering. The combination of seasoned beef, gooey cheese, and crispy tortillas creates a delightful explosion of flavors and textures that is simply irresistible. Plus, they are incredibly versatile! You can serve them with a side of guacamole, fresh salsa, or a dollop of sour cream for that extra zing. If you’re feeling adventurous, consider adding some black beans or jalapeños to the filling for a spicy twist, or even swap out the beef for shredded chicken or a vegetarian option like sautéed mushrooms and spinach. I encourage you to give this recipe a go and experience the joy of making your own Beef Cheese Chimichangas at home. Trust me, once you take that first bite, you’ll understand why this dish is a favorite among many. Don’t forget to share your experience with friends and family, and let them know how much you enjoyed this delicious recipe. I’d love to hear your thoughts and any variations you tried! Happy cooking! Print
Beef Cheese Chimichangas: A Delicious Recipe for a Flavorful Mexican Delight
- Total Time: 35 minutes
- Yield: 4 chimichangas 1x
Description
Enjoy crispy, cheesy chimichangas filled with seasoned ground beef and melted cheeses, perfectly fried to golden perfection. Serve with sour cream, guacamole, and salsa for a delightful treat!
Ingredients
Scale- 1 pound ground beef
- 1 cup shredded cheddar cheese
- 1 cup shredded Monterey Jack cheese
- 1 small onion, finely chopped
- 2 cloves garlic, minced
- 1 teaspoon ground cumin
- 1 teaspoon chili powder
- 1/2 teaspoon paprika
- Salt and pepper to taste
- 4 large flour tortillas
- Vegetable oil for frying
- Sour cream, for serving
- Guacamole, for serving
- Salsa, for serving
Instructions
- In a large skillet, heat a tablespoon of vegetable oil over medium heat. Once the oil is hot, add the chopped onion and sauté for about 3-4 minutes until it becomes translucent.
- Add the minced garlic to the skillet and cook for an additional 1 minute, stirring frequently to prevent burning.
- Next, add the ground beef to the skillet. Use a spatula to break it up into smaller pieces as it cooks. Cook until the beef is browned and no longer pink, about 5-7 minutes.
- Once the beef is cooked, drain any excess fat from the skillet.
- Season the beef mixture with cumin, chili powder, paprika, salt, and pepper. Stir well to combine and let it cook for another 2-3 minutes.
- Remove from heat and stir in the shredded cheddar and Monterey Jack cheeses until melted and well incorporated.
- Lay a large flour tortilla on a clean surface. Spoon about 1/4 of the beef and cheese mixture into the center of the tortilla.
- Fold the sides of the tortilla over the filling, then roll it up from the bottom to the top, tucking in the sides as you go.
- Repeat with the remaining tortillas and filling.
- In a large skillet or heavy-bottomed pot, pour enough vegetable oil to cover the bottom by about 1 inch. Heat the oil over medium-high heat until it reaches 350°F (175°C).
- Carefully place the chimichangas seam-side down into the hot oil, frying in batches if necessary.
- Fry for about 3-4 minutes on each side, or until golden brown and crispy. Use tongs to turn them halfway through.
- Remove from oil and place on a plate lined with paper towels to drain excess oil.
- Place the chimichangas on a serving platter. Cut in half diagonally for presentation, or serve whole.
- Serve with sour cream, guacamole, and salsa for dipping.
Notes
- Ensure the oil is hot enough before frying to achieve a crispy texture.
- Feel free to customize the filling with additional ingredients like beans or vegetables.
- Leftover chimichangas can be stored in the refrigerator and reheated in the oven for best results.
- Prep Time: 15 minutes
- Cook Time: 20 minutes


Leave a Comment