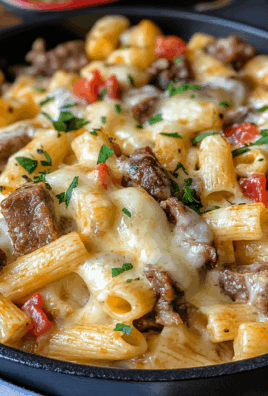
If you love the flavors of a juicy bacon cheeseburger but want something a little different, this Bacon Cheeseburger Pie is the perfect dish! A savory, cheesy, and hearty meal, it’s packed with seasoned ground beef, crispy bacon, and melted cheese, all baked in a flaky crust. It’s an easy-to-make, family-friendly recipe that’s perfect for busy weeknights or a fun weekend treat.
🛒 Ingredients
- 1 refrigerated pie crust – The perfect flaky base for this dish.
- 500 g (1 lb) ground beef – The heart of the dish, seasoned for maximum flavor.
- 6 slices of bacon, cooked and crumbled – Adds a smoky, crispy bite.
- 1 small onion, finely chopped – For a subtle sweetness and depth of flavor.
- 2 cloves garlic, minced – Enhances the overall taste.
- 1 tbsp Worcestershire sauce – Brings out the rich, umami flavor.
- ½ tsp salt – To season the meat perfectly.
- ½ tsp black pepper – For a little kick.
- 1 cup (100 g) shredded cheddar cheese – Melts beautifully into the pie.
- 2 large eggs – Helps bind everything together.
- ½ cup (120 ml) milk – Creates a creamy, custard-like filling.
- 1 tbsp mustard (optional) – Adds a tangy kick reminiscent of a classic cheeseburger.
- 1 tbsp ketchup – Balances the flavors with a hint of sweetness.
👉 Tip: For an extra kick, add a teaspoon of hot sauce or chopped pickles to the mixture!
👨🍳 How to Make Bacon Cheeseburger Pie
Step 1: Preheat the Oven & Prepare the Pie Crust
Preheat your oven to 180°C (350°F). Place the pie crust in a 9-inch pie dish, pressing it gently into the edges. Prick the bottom with a fork and prebake for 5 minutes to prevent sogginess.
Step 2: Cook the Beef and Bacon
- In a large skillet, cook the bacon until crispy. Remove, drain on paper towels, and crumble.
- In the same skillet, sauté the chopped onion and garlic in the bacon grease for 2 minutes.
- Add the ground beef, Worcestershire sauce, salt, and pepper. Cook until browned, then drain excess grease.
Step 3: Assemble the Pie
- Spread the cooked beef mixture evenly over the pie crust.
- Sprinkle crumbled bacon and shredded cheddar cheese on top.
Step 4: Make the Custard Mixture
- In a small bowl, whisk together the eggs, milk, mustard, and ketchup.
- Pour this mixture over the beef and cheese, ensuring it’s evenly distributed.
Step 5: Bake the Pie
Bake for 30-35 minutes, or until the filling is set and the top is golden brown.
Step 6: Let It Cool & Serve
Let the pie sit for 5 minutes before slicing. Serve with a side of pickles, lettuce, and tomato for that full cheeseburger experience!
🔪 Equipment Needed
- 9-inch pie dish
- Large skillet
- Mixing bowls
- Whisk
- Oven
❓ Frequently Asked Questions
Can I make this pie ahead of time?
Yes! You can assemble it ahead and store it in the fridge for up to 24 hours before baking.
What’s the best cheese for this recipe?
Cheddar is classic, but you can also use Monterey Jack, Swiss, or a mix for extra cheesiness.
Can I use a different type of meat?
Absolutely! Ground turkey or chicken can be used for a leaner version.
How do I store leftovers?
Keep leftovers in an airtight container in the fridge for up to 3 days. Reheat in the oven at 160°C (325°F) for best results.
Can I make this without a crust?
Yes! Skip the crust and bake it in a greased dish for a low-carb version.
🍽 Conclusion
This Bacon Cheeseburger Pie is a fun twist on a classic burger, combining all the best flavors in a warm, cheesy, and satisfying dish. If you loved this recipe, share it on Facebook or save it on Pinterest to make it again! Enjoy! 😋
Print
Delicious Bacon Cheeseburger Pie
- Total Time: 30 minutes
- Yield: 4 1x
Description
If you love the flavors of a juicy bacon cheeseburger but want something a little different, this Bacon Cheeseburger Pie is the perfect dish! A savory, cheesy, and hearty meal, it’s packed with seasoned ground beef, crispy bacon, and melted cheese, all baked in a flaky crust. It’s an easy-to-make, family-friendly recipe that’s perfect for busy weeknights or a fun weekend treat.
Ingredients
- 1 refrigerated pie crust – The perfect flaky base for this dish.
- 500 g (1 lb) ground beef – The heart of the dish, seasoned for maximum flavor.
- 6 slices of bacon, cooked and crumbled – Adds a smoky, crispy bite.
- 1 small onion, finely chopped – For a subtle sweetness and depth of flavor.
- 2 cloves garlic, minced – Enhances the overall taste.
- 1 tbsp Worcestershire sauce – Brings out the rich, umami flavor.
- ½ tsp salt – To season the meat perfectly.
- ½ tsp black pepper – For a little kick.
- 1 cup (100 g) shredded cheddar cheese – Melts beautifully into the pie.
- 2 large eggs – Helps bind everything together.
- ½ cup (120 ml) milk – Creates a creamy, custard-like filling.
- 1 tbsp mustard (optional) – Adds a tangy kick reminiscent of a classic cheeseburger.
- 1 tbsp ketchup – Balances the flavors with a hint of sweetness.
Instructions
Step 1: Preheat the Oven & Prepare the Pie Crust
Preheat your oven to 180°C (350°F). Place the pie crust in a 9-inch pie dish, pressing it gently into the edges. Prick the bottom with a fork and prebake for 5 minutes to prevent sogginess.
Step 2: Cook the Beef and Bacon
- In a large skillet, cook the bacon until crispy. Remove, drain on paper towels, and crumble.
- In the same skillet, sauté the chopped onion and garlic in the bacon grease for 2 minutes.
- Add the ground beef, Worcestershire sauce, salt, and pepper. Cook until browned, then drain excess grease.
Step 3: Assemble the Pie
- Spread the cooked beef mixture evenly over the pie crust.
- Sprinkle crumbled bacon and shredded cheddar cheese on top.
Step 4: Make the Custard Mixture
- In a small bowl, whisk together the eggs, milk, mustard, and ketchup.
- Pour this mixture over the beef and cheese, ensuring it’s evenly distributed.
Step 5: Bake the Pie
Bake for 30-35 minutes, or until the filling is set and the top is golden brown.
Step 6: Let It Cool & Serve
Let the pie sit for 5 minutes before slicing. Serve with a side of pickles, lettuce, and tomato for that full cheeseburger experience!
Notes
This Bacon Cheeseburger Pie is a fun twist on a classic burger, combining all the best flavors in a warm, cheesy, and satisfying dish. If you loved this recipe, share it on Facebook or save it on Pinterest to make it again! Enjoy! 😋
- Prep Time: 10 min
- Cook Time: 20 min


Leave a Comment