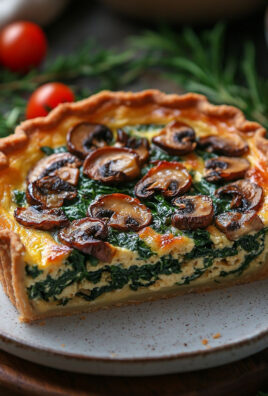
If you love soft, cheesy, and golden breadsticks, this homemade Cheese Breadsticks recipe is going to be your new favorite! These breadsticks are crispy on the outside, soft on the inside, and loaded with gooey melted cheese. Perfect as a side for pasta, soups, or as a snack, they are easy to make and completely irresistible!
Let’s get baking!
Ingredients for Cheese Breadsticks
For the Dough:
- All-Purpose Flour (2 ½ cups) – The base for a soft and chewy breadstick.
- Warm Water (¾ cup, about 110°F/45°C) – Activates the yeast.
- Active Dry Yeast (2 ¼ teaspoons or 1 packet) – Helps the dough rise beautifully.
- Sugar (1 tablespoon) – Feeds the yeast and adds a slight touch of sweetness.
- Salt (1 teaspoon) – Enhances the flavor.
- Olive Oil (2 tablespoons) – Adds moisture and a soft texture.
For the Topping:
- Butter (3 tablespoons, melted) – Adds richness and flavor.
- Garlic Powder (1 teaspoon) – Gives a delicious garlic kick.
- Mozzarella Cheese (1 ½ cups, shredded) – Melts beautifully and creates gooey goodness.
- Parmesan Cheese (¼ cup, grated) – Adds a salty, nutty bite.
- Italian Seasoning (1 teaspoon) – For an herby flavor boost.
- Red Pepper Flakes (optional, for spice) – Adds a little heat if you like it spicy.
How to Make Cheese Breadsticks
Step 1: Prepare the Dough
- In a small bowl, combine warm water, yeast, and sugar. Stir gently and let sit for 5-10 minutes until foamy.
- In a large mixing bowl, combine flour and salt.
- Pour in the yeast mixture and olive oil, then mix until a dough forms.
- Knead the dough on a floured surface for 5-7 minutes, until smooth and elastic.
- Place the dough in a greased bowl, cover with a towel, and let it rise in a warm place for 1 hour, or until doubled in size.
Step 2: Shape the Breadsticks
- Preheat oven to 400°F (200°C) and line a baking sheet with parchment paper.
- Roll out the dough into a rectangular shape (about 10×12 inches).
- Brush with melted butter and sprinkle garlic powder over the top.
- Evenly distribute mozzarella, Parmesan, Italian seasoning, and red pepper flakes (if using).
Step 3: Bake the Breadsticks
- Use a pizza cutter or knife to lightly score the dough into breadstick-sized strips.
- Bake for 15-18 minutes, or until golden brown and bubbly.
- Remove from the oven and let cool slightly before slicing into sticks.
Step 4: Serve & Enjoy!
- Serve warm with marinara sauce, ranch dressing, or garlic butter for dipping.
- Enjoy your cheesy, garlicky, and delicious homemade breadsticks!
Tips for the Best Cheese Breadsticks
✔ For extra cheesy breadsticks, add more mozzarella before baking.
✔ Want them crispier? Bake for a few extra minutes until the cheese is golden brown.
✔ Prefer a shortcut? Use pizza dough or store-bought bread dough for a quicker version.
✔ Add toppings! Sprinkle chopped basil or more Parmesan after baking for extra flavor.
Storage & Reheating
How to store leftovers:
- Store in an airtight container at room temperature for 1-2 days or in the fridge for up to 5 days.
How to reheat:
- Oven: Bake at 350°F (175°C) for 5-7 minutes to crisp them up.
- Microwave: Heat for 20-30 seconds, but they’ll be softer.
Can I freeze them?
- Yes! Freeze after baking for up to 2 months. Reheat in the oven until warm and crispy.
Frequently Asked Questions
Can I use pre-made pizza dough?
Yes! Store-bought pizza dough works great—just roll it out and add the toppings as directed.
What’s the best cheese to use?
Mozzarella melts beautifully, but you can also use cheddar, gouda, or provolone for extra flavor.
Can I make these without yeast?
Yes! You can use self-rising flour or make a quick dough with baking powder and yogurt. The texture will be different but still delicious.
What dipping sauces go best with these breadsticks?
- Marinara sauce (classic choice)
- Ranch dressing
- Garlic butter sauce
- Alfredo sauce for extra creaminess
Conclusion
These Cheese Breadsticks are soft, cheesy, garlicky, and totally addictive. Whether you’re making them as a side dish, appetizer, or snack, they’ll quickly become a family favorite!
If you loved this recipe, share it on Facebook or save it to Pinterest for later. Happy baking! 🧀✨


Leave a Comment