

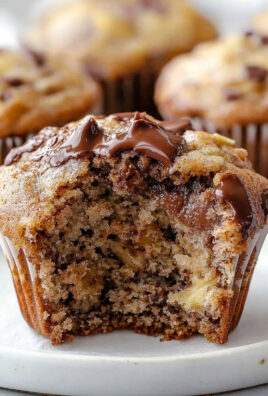
If you love Boston Cream Pie and cheesecake, get ready for the ultimate dessert fusion! This Boston Chocolate Cream Pie Cheesecake combines the best of both worlds—rich, creamy cheesecake layered with a light sponge cake, topped with a luscious chocolate ganache. It’s indulgent, decadent, and absolutely irresistible. Perfect for special occasions or when you just need a serious chocolate fix!
🛒 Ingredients
For the Sponge Cake Layer
- 1 cup all-purpose flour – Provides structure to the cake base.
- ½ cup sugar – Adds sweetness and helps create a tender crumb.
- 2 large eggs – Adds moisture and structure.
- ½ cup whole milk – Keeps the cake soft and moist.
- 1 tsp vanilla extract – Enhances the flavor.
- 1 tsp baking powder – Helps the cake rise.
- ¼ tsp salt – Balances the sweetness.
- 2 tbsp unsalted butter, melted – Adds richness.
For the Cheesecake Layer
- 16 oz (450g) cream cheese, softened – The heart of any good cheesecake.
- ¾ cup sugar – Sweetens the creamy filling.
- 2 large eggs – Helps set the cheesecake.
- ½ cup sour cream – Adds tang and smoothness.
- 1 tsp vanilla extract – For a warm, classic flavor.
For the Chocolate Ganache
- 1 cup heavy cream – Creates a silky ganache.
- 1 ½ cups semisweet chocolate chips – Gives that rich chocolatey goodness.
- 1 tbsp unsalted butter – Adds shine and smoothness.
💡 Pro Tip: If you want an extra creamy cheesecake, make sure all your ingredients are at room temperature before mixing!
🔥 How to Make Boston Chocolate Cream Pie Cheesecake
Step 1: Prepare the Sponge Cake Base
- Preheat your oven to 350°F (175°C) and grease a 9-inch springform pan.
- In a bowl, whisk together the flour, baking powder, and salt.
- In another bowl, beat the eggs and sugar until light and fluffy. Add the vanilla, milk, and melted butter.
- Gradually fold in the dry ingredients until just combined.
- Pour the batter into the prepared pan and bake for 12-15 minutes, until a toothpick comes out clean. Let cool while preparing the cheesecake layer.
Step 2: Make the Cheesecake Layer
- Reduce the oven temperature to 325°F (160°C).
- In a large bowl, beat the cream cheese and sugar until smooth.
- Add the eggs one at a time, mixing after each addition.
- Mix in the sour cream and vanilla until well combined.
- Pour the cheesecake batter over the cooled sponge cake base.
- Bake for 45-50 minutes, until the center is set but slightly jiggly.
- Turn off the oven and let the cheesecake cool inside for 1 hour, then refrigerate for at least 4 hours (overnight is best!).
Step 3: Prepare the Chocolate Ganache
- Heat the heavy cream in a small saucepan over medium heat until it just starts to simmer.
- Pour over the chocolate chips and let sit for 2 minutes.
- Stir until smooth, then mix in the butter for extra shine.
- Let cool slightly before pouring over the chilled cheesecake.
Step 4: Assemble and Serve
- Pour the chocolate ganache evenly over the cheesecake, letting it drip down the sides.
- Refrigerate for another 30 minutes to set.
- Slice, serve, and enjoy this heavenly dessert!
🏺 Equipment Needed
- 9-inch springform pan
- Mixing bowls
- Hand or stand mixer
- Saucepan
- Spatula
- Cooling rack
❓ Frequently Asked Questions
Can I make this cheesecake ahead of time?
Yes! In fact, it tastes even better the next day after chilling overnight.
How do I prevent cracks in my cheesecake?
Make sure to bake at a lower temperature and let it cool gradually in the oven before refrigerating.
What kind of chocolate works best for the ganache?
Use high-quality semisweet or dark chocolate for the best flavor and texture.
Can I use a different base instead of sponge cake?
Absolutely! You can use a graham cracker crust or even a chocolate cookie crust for a twist.
How do I store leftovers?
Keep the cheesecake covered in the fridge for up to 5 days or freeze slices for up to 3 months.
🥰 Conclusion
This Boston Chocolate Cream Pie Cheesecake is an absolute showstopper—rich, creamy, and covered in decadent chocolate ganache. Whether it’s for a celebration or just because you deserve a treat, this cheesecake won’t disappoint! If you loved this recipe, don’t forget to share it on Facebook or save it on Pinterest for later. Happy baking! 🍰💕

Leave a Comment