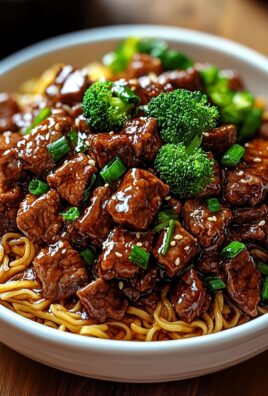
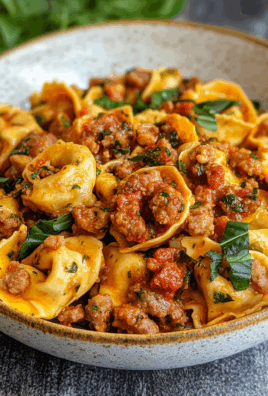
When it comes to comfort food, smothered chicken and rice is at the top of the list. Creamy, flavorful, and hearty, this dish brings together tender chicken, a savory gravy, and perfectly cooked rice to create a meal that feels like a warm hug on a plate. Whether you’re feeding the family on a weeknight or treating yourself to some comfort cooking, this recipe is a must-try.
Ingredients
What You’ll Need
- 4 bone-in, skin-on chicken thighs – The bone and skin add flavor and keep the chicken juicy as it cooks.
- 1 cup of long-grain white rice – Perfectly fluffy rice that soaks up all the gravy goodness.
- 2 cups chicken broth – Adds depth of flavor and keeps the dish moist and savory.
- 1 medium onion, diced – Sweet and aromatic, onions create the base of the gravy.
- 3 cloves garlic, minced – Enhances the flavor with a touch of garlicky goodness.
- 1/4 cup all-purpose flour – Helps thicken the gravy to the perfect consistency.
- 2 cups whole milk – Creates a rich, creamy gravy that ties everything together.
- 2 tablespoons olive oil – For browning the chicken to golden perfection.
- 2 tablespoons unsalted butter – Adds richness to the gravy.
- 1 teaspoon smoked paprika – For a warm, smoky flavor.
- 1/2 teaspoon dried thyme – A subtle herbal note that complements the chicken.
- Salt and pepper to taste – Balances and enhances the overall flavor.
Quick Prep Tip: Chop your onions and garlic and measure out your flour and spices before starting. This makes the cooking process smoother and more enjoyable!
How to Make Smothered Chicken and Rice
Step 1: Season and Sear the Chicken
Season the chicken thighs generously with salt, pepper, and smoked paprika. Heat the olive oil in a large skillet over medium-high heat. Sear the chicken on both sides until golden brown, about 4–5 minutes per side. Remove the chicken from the skillet and set it aside.
Step 2: Sauté the Aromatics
In the same skillet, melt the butter and add the diced onions. Sauté for about 3–4 minutes, until the onions are soft and translucent. Add the minced garlic and cook for another minute, stirring constantly to prevent burning.
Step 3: Make the Gravy
Sprinkle the flour over the onions and garlic, stirring well to coat. Cook for 1–2 minutes to get rid of the raw flour taste. Slowly whisk in the chicken broth and milk, making sure there are no lumps. Add the dried thyme and let the gravy simmer until thickened, about 5 minutes.
Step 4: Combine Chicken and Rice
Preheat your oven to 350°F (175°C). In a baking dish, spread the uncooked rice evenly. Pour 1 cup of the gravy over the rice, stirring to coat. Nestle the seared chicken thighs on top of the rice. Pour the remaining gravy over the chicken, ensuring everything is well-covered.
Step 5: Bake to Perfection
Cover the dish tightly with foil and bake in the preheated oven for 35–40 minutes, or until the chicken is cooked through and the rice is tender. Remove the foil during the last 10 minutes for a slightly crispy top.
Step 6: Serve and Enjoy
Let the dish rest for 5 minutes after baking. Garnish with fresh parsley (optional) and serve hot. The creamy gravy, tender chicken, and perfectly cooked rice are ready to be devoured!
Equipment Needed
- Large skillet
- Whisk
- Baking dish
- Measuring cups and spoons
- Aluminum foil
Frequently Asked Questions
Can I use chicken breasts instead of thighs?
Yes, but keep in mind that chicken breasts can cook faster and may dry out if overcooked. Bone-in, skin-on thighs are preferred for this recipe as they stay moist and add flavor.
Can I use brown rice instead of white rice?
You can, but brown rice has a longer cooking time and may require additional liquid. Adjust the baking time accordingly.
What if I don’t have chicken broth?
You can substitute with vegetable broth, or even water, though the flavor may be less rich. Adding a bouillon cube can also enhance the flavor.
Can I make this recipe ahead of time?
Absolutely! You can prepare the dish up to the baking step, cover it tightly, and refrigerate it for up to 24 hours. When ready to bake, add 5–10 minutes to the cooking time.
How do I store leftovers?
Store leftovers in an airtight container in the refrigerator for up to 3 days. Reheat in the oven or microwave until warmed through.
Can I freeze this dish?
Yes! Let the dish cool completely, then store in a freezer-safe container. It can be frozen for up to 2 months. Thaw overnight in the refrigerator before reheating.
What can I serve with smothered chicken and rice?
This dish is hearty on its own, but it pairs well with steamed green beans, a crisp side salad, or roasted vegetables.
Conclusion
There’s something magical about smothered chicken and rice—rich, creamy, and packed with flavor, it’s the ultimate comfort food. I hope you enjoyed this recipe as much as I do! Don’t forget to share it with your friends and family on Facebook using the share buttons below, or save it to Pinterest for your next cozy dinner night. Enjoy! 😊
Vous avez dit :
Old-Fashioned Salmon Patties
ChatGPT a dit :
Old-Fashioned Salmon Patties: A Classic Family Recipe
Old-fashioned salmon patties are a nostalgic, budget-friendly dish that’s been a staple in many households for generations. Made with canned salmon, simple pantry staples, and a touch of seasoning, these patties are crispy on the outside, tender on the inside, and bursting with flavor. Perfect for a quick weeknight meal or a weekend brunch, these patties will quickly become a favorite in your home.
Ingredients
What You’ll Need
- 1 (14.75 oz) can of salmon, drained and flaked – This is the star of the dish! Canned salmon is affordable and packed with protein.
- 1/2 cup breadcrumbs (or crushed saltine crackers) – These hold the patties together and give them a slight crunch.
- 1 egg, beaten – Acts as a binder to keep the patties from falling apart.
- 1/4 cup diced onion – Adds a mild, savory flavor and texture.
- 2 tablespoons fresh parsley, chopped – Brightens up the patties with fresh, herbaceous notes.
- 1/2 teaspoon garlic powder – For a subtle boost of flavor.
- Salt and pepper to taste – Enhances and balances the overall flavor.
- 1 tablespoon lemon juice – Adds a zesty freshness that complements the salmon.
- 2 tablespoons vegetable oil – For frying the patties to golden perfection.
Quick Tip: Use a fork to break apart the salmon in the can and remove any large bones or skin before mixing the ingredients.
How to Make Old-Fashioned Salmon Patties
Step 1: Prepare the Mixture
In a large mixing bowl, combine the drained and flaked salmon, breadcrumbs, beaten egg, diced onion, parsley, garlic powder, salt, pepper, and lemon juice. Mix everything together until evenly combined.
Step 2: Shape the Patties
Using your hands, form the mixture into 4–6 evenly sized patties, about 1/2 inch thick. If the mixture is too wet, add a bit more breadcrumbs until it holds together.
Step 3: Heat the Oil
Heat the vegetable oil in a large skillet over medium heat. Make sure the oil is hot but not smoking before adding the patties to prevent sticking.
Step 4: Cook the Patties
Place the patties in the skillet and cook for 3–4 minutes per side, or until golden brown and crispy on the outside. Avoid overcrowding the pan to ensure even cooking.
Step 5: Drain and Serve
Once cooked, transfer the patties to a plate lined with paper towels to drain any excess oil. Serve immediately with your favorite dipping sauce or alongside a fresh salad, rice, or mashed potatoes.
Equipment Needed
- Mixing bowl
- Fork (for flaking the salmon)
- Large skillet
- Spatula
- Paper towels for draining
Frequently Asked Questions
Can I use fresh salmon instead of canned salmon?
Yes, fresh salmon works great! Simply cook the salmon first, flake it, and follow the same recipe.
What can I use instead of breadcrumbs?
Crushed saltine crackers or panko breadcrumbs are great alternatives. If you’re gluten-free, try almond flour or gluten-free breadcrumbs.
Can I bake these salmon patties instead of frying?
Absolutely! Preheat your oven to 375°F (190°C), place the patties on a baking sheet lined with parchment paper, and bake for 15–20 minutes, flipping halfway through.
How do I store leftovers?
Store leftover salmon patties in an airtight container in the refrigerator for up to 3 days. Reheat them in a skillet or the oven to keep them crispy.
Can I freeze salmon patties?
Yes, these freeze beautifully! Freeze uncooked patties in a single layer on a baking sheet, then transfer to a freezer bag or container. Cook them straight from frozen, adding a few extra minutes to the cooking time.
What dipping sauces pair well with salmon patties?
Tartar sauce, lemon aioli, spicy mayo, or even a simple squeeze of fresh lemon juice are all excellent options.
Can I make these salmon patties healthier?
For a lighter version, bake them instead of frying, and use whole wheat breadcrumbs or oatmeal as the binder.
Conclusion
Old-fashioned salmon patties are a timeless recipe that’s easy, versatile, and always satisfying. Whether you’re looking for a quick meal or a nostalgic dish to share with loved ones, these patties are sure to please. If you enjoyed this recipe, share it with your friends on Facebook or save it to Pinterest for later. Let’s keep the tradition alive! 😊


Leave a Comment