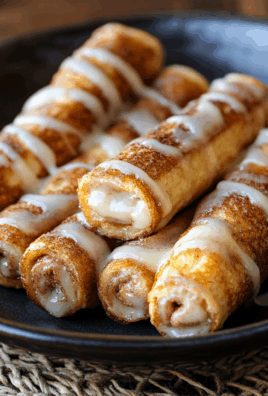
No-Bake Crunch Bars are the perfect combination of chocolatey goodness and crispy texture. Made with just a few simple ingredients, they’re quick to prepare and require no oven time—ideal for a busy day or when a chocolate craving strikes. Perfect for kids, parties, or a delightful snack at home, these bars are guaranteed to be a hit!
Ingredients for No-Bake Crunch Bars
Here’s what you’ll need for this easy and delicious dessert:
- Semi-Sweet Chocolate Chips (2 cups)
The base for the bars. Semi-sweet chocolate balances sweetness with a rich cocoa flavor. - Peanut Butter (½ cup, creamy)
Adds creaminess and a subtle nutty flavor that pairs beautifully with chocolate. - Butter (2 tablespoons)
Helps the chocolate mixture set with a smooth and glossy finish. - Crispy Rice Cereal (3 cups)
The crunch factor! The cereal creates the light, crispy texture that makes these bars so irresistible. - Vanilla Extract (1 teaspoon, optional)
Enhances the flavor of the chocolate and peanut butter. - Pinch of Salt (optional)
Balances the sweetness and enhances the overall flavor.
How to Make No-Bake Crunch Bars
These bars come together quickly with no oven required!
Step 1: Prepare the Pan
Line an 8×8-inch or 9×9-inch baking dish with parchment paper, leaving an overhang on the sides for easy removal.
Step 2: Melt the Chocolate Mixture
- In a microwave-safe bowl, combine the chocolate chips, peanut butter, and butter.
- Microwave in 30-second intervals, stirring after each interval, until the mixture is smooth and fully melted. Be careful not to overheat.
- Stir in the vanilla extract and a pinch of salt, if using.
Step 3: Mix in the Cereal
- Add the crispy rice cereal to the melted chocolate mixture.
- Gently fold until the cereal is evenly coated with the chocolate mixture.
Step 4: Press into the Pan
- Pour the mixture into the prepared baking dish.
- Use a spatula or the back of a spoon to press it down into an even layer.
Step 5: Chill
- Place the pan in the refrigerator for at least 1 hour, or until the bars are firm and set.
Step 6: Slice and Serve
- Once chilled, lift the bars out of the pan using the parchment paper overhang.
- Cut into squares or rectangles and enjoy!
Equipment Needed
- Microwave-safe bowl
- Spatula or spoon
- 8×8-inch or 9×9-inch baking dish
- Parchment paper
Frequently Asked Questions
Can I use a different type of chocolate?
Yes! Dark chocolate, milk chocolate, or white chocolate all work well. Choose your favorite or mix and match for a unique flavor.
Can I make this nut-free?
Absolutely! Replace peanut butter with sunflower seed butter or any other nut-free alternative.
How should I store these bars?
Store the bars in an airtight container in the refrigerator for up to 1 week. For a firmer texture, keep them chilled; for softer bars, let them sit at room temperature for a few minutes before serving.
Can I freeze No-Bake Crunch Bars?
Yes! Wrap individual bars in plastic wrap and store them in a freezer-safe container for up to 2 months. Thaw in the refrigerator before enjoying.
What can I use instead of crispy rice cereal?
Cornflakes, puffed quinoa, or crushed graham crackers are great substitutes if you don’t have crispy rice cereal on hand.
Can I add mix-ins?
Of course! Try adding mini marshmallows, chopped nuts, dried fruit, or coconut flakes to the chocolate mixture for extra flavor and texture.
Can I double the recipe?
Yes, simply double the ingredients and use a 9×13-inch pan to accommodate the larger quantity.
Conclusion
No-Bake Crunch Bars are the perfect treat when you need something quick, easy, and utterly delicious. With their crispy texture and rich chocolate flavor, they’re bound to become a household favorite.
If you loved this recipe, share it with your friends on Facebook or save it to Pinterest for later. Happy snacking! 🍫✨


Leave a Comment