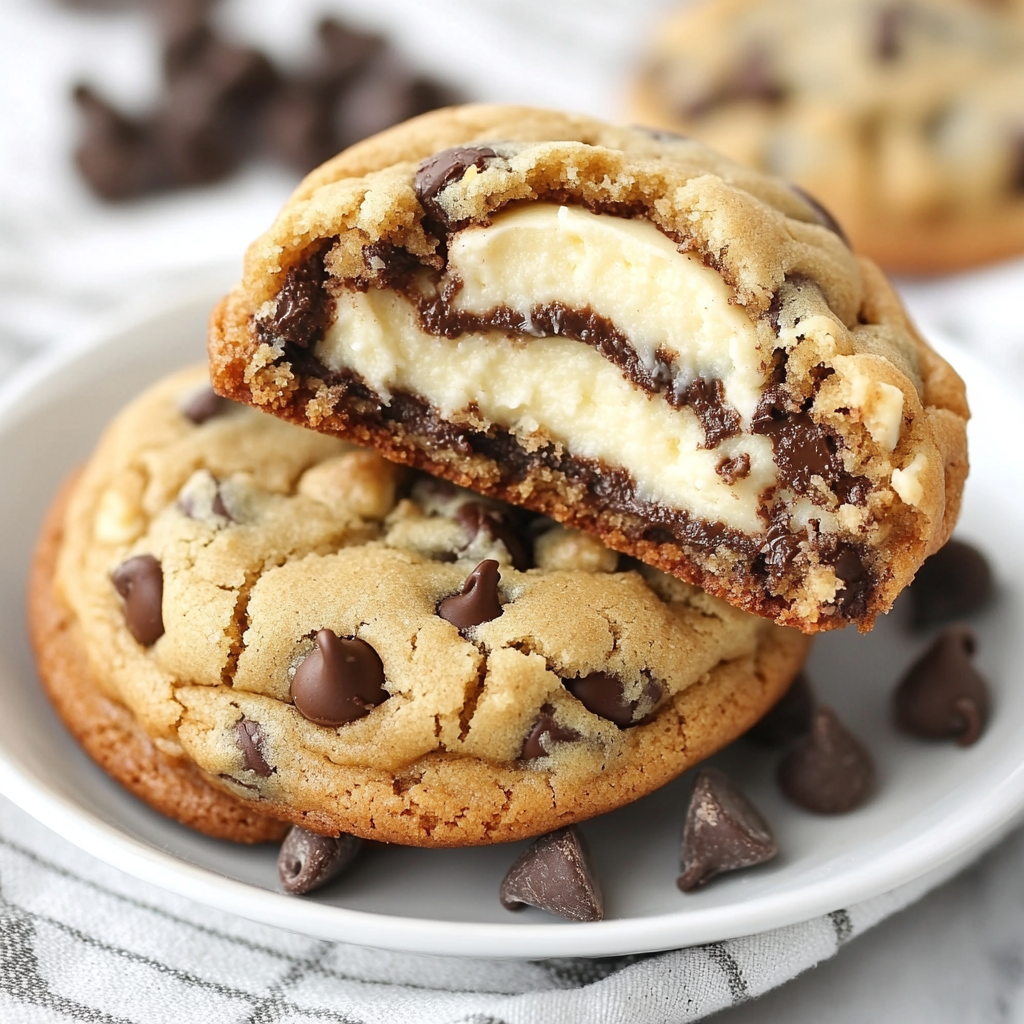
If you love cheesecake and chocolate chip cookies, why not combine the best of both worlds? These Chocolate Chip Cheesecake Cookies are soft, creamy, and packed with chocolatey goodness. With a hint of tangy cream cheese and the comforting sweetness of cookies, they’re perfect for dessert or a sweet snack anytime. Let’s get baking!
Ingredients for Chocolate Chip Cheesecake Cookies
For the Dough:
- All-Purpose Flour (2 cups)
Provides the structure for your cookies. Be sure to measure accurately for a perfect texture. - Baking Powder (1 teaspoon)
Helps the cookies rise slightly for a soft and fluffy bite. - Salt (½ teaspoon)
Balances the sweetness and enhances the overall flavor. - Unsalted Butter (½ cup, softened)
Adds richness and moisture to the cookies. - Cream Cheese (4 ounces, softened)
The star ingredient that gives these cookies their creamy texture and slight tang. - Granulated Sugar (¾ cup)
Sweetens the dough and helps achieve that soft texture. - Brown Sugar (¼ cup)
Adds a hint of molasses flavor and makes the cookies slightly chewy. - Egg (1 large)
Binds the ingredients and adds moisture to the dough. - Vanilla Extract (1 teaspoon)
Enhances the flavor with a warm and sweet note. - Chocolate Chips (1 ½ cups)
Use semi-sweet, milk, or dark chocolate chips for a rich, chocolatey flavor.
How to Make Chocolate Chip Cheesecake Cookies
Step 1: Preheat the Oven
Preheat your oven to 350°F (175°C) and line two baking sheets with parchment paper.
Step 2: Mix the Dry Ingredients
In a medium-sized bowl, whisk together the flour, baking powder, and salt. Set aside.
Step 3: Cream the Butter and Cream Cheese
In a large mixing bowl, beat the softened butter, cream cheese, granulated sugar, and brown sugar together until light and fluffy (about 2-3 minutes).
Step 4: Add the Wet Ingredients
Mix in the egg and vanilla extract until well combined.
Step 5: Combine Wet and Dry Ingredients
Gradually add the dry ingredients to the wet mixture, mixing until just combined. Be careful not to overmix, as this can make the cookies dense.
Step 6: Fold in the Chocolate Chips
Using a spatula, gently fold in the chocolate chips, ensuring they’re evenly distributed throughout the dough.
Step 7: Portion the Dough
Use a cookie scoop or spoon to drop rounded tablespoons of dough onto the prepared baking sheets, spacing them about 2 inches apart.
Step 8: Bake the Cookies
Bake for 10-12 minutes, or until the edges are lightly golden and the centers look set but still soft.
Let the cookies cool on the baking sheet for 5 minutes before transferring them to a wire rack to cool completely.
Equipment Needed
- Mixing bowls (2)
- Electric mixer or whisk
- Cookie scoop or spoon
- Baking sheets
- Parchment paper
- Spatula
Frequently Asked Questions
Can I use low-fat cream cheese?
Full-fat cream cheese is recommended for the best texture and flavor, but you can use low-fat if needed. Avoid fat-free, as it may make the cookies too soft.
Can I freeze the dough?
Yes! Scoop the dough into balls and freeze them on a baking sheet. Once frozen, transfer them to a zip-top bag. Bake directly from frozen, adding 1-2 minutes to the baking time.
What type of chocolate chips work best?
Semi-sweet chocolate chips are classic, but you can also use dark, milk, or even white chocolate chips depending on your preference.
How do I store the cookies?
Store the cookies in an airtight container at room temperature for up to 3 days or in the refrigerator for up to 5 days.
Can I add nuts to the dough?
Absolutely! Chopped walnuts, pecans, or almonds would be a great addition. Use about ½ cup and fold them in with the chocolate chips.
Why are my cookies spreading too much?
Make sure your butter and cream cheese are softened but not overly warm. If the dough feels too soft, chill it in the refrigerator for 30 minutes before baking.
Can I double the recipe?
Yes, this recipe can easily be doubled. Just ensure you have enough baking sheets to accommodate the larger batch.
Conclusion
These Chocolate Chip Cheesecake Cookies are the perfect blend of creamy and chocolatey indulgence. They’re easy to make, utterly delicious, and sure to be a hit with everyone who tries them. I hope you enjoy this recipe as much as I do! Don’t forget to share it on Facebook or save it to Pinterest for your next baking day. Happy baking! 😊


Leave a Comment