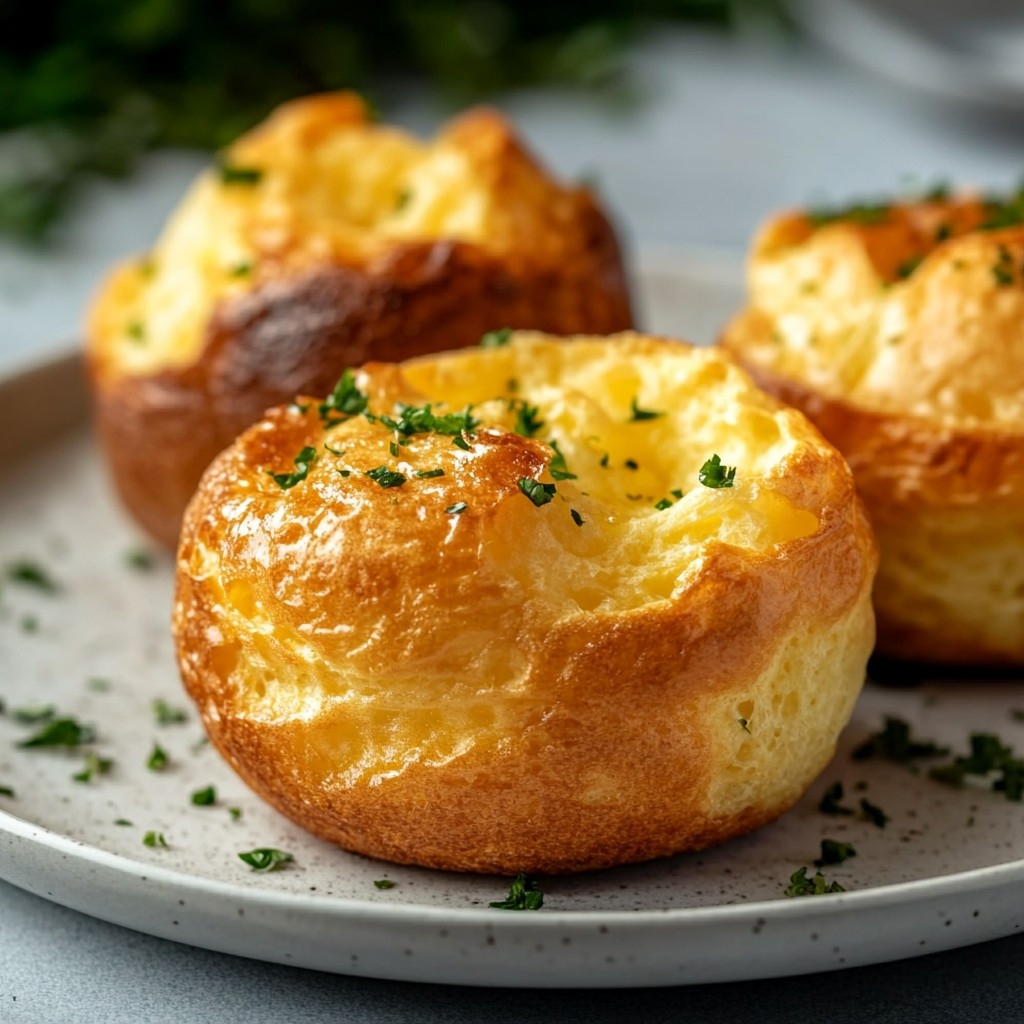
Classic homemade popovers are a delightful addition to any meal, and they hold a special place in my heart. These airy, golden-brown pastries are not only visually stunning but also incredibly versatile, making them a favorite in kitchens around the world. Originating from the United States in the 19th century, popovers have become a staple in both casual and formal dining settings, often served alongside soups, salads, or even as a stand-alone treat. What I love most about classic homemade popovers is their unique texture—crispy on the outside and soft on the inside, they create a delightful contrast that keeps everyone coming back for more. Plus, they are surprisingly easy to make, allowing you to impress your guests without spending hours in the kitchen. Whether you enjoy them fresh out of the oven or filled with sweet or savory fillings, classic homemade popovers are sure to become a beloved recipe in your home.
Ingredients:
- 1 cup all-purpose flour
- 1 cup milk
- 3 large eggs
- 1/2 teaspoon salt
- 2 tablespoons unsalted butter, melted
- Extra butter or oil for greasing the popover pan
Preparing the Batter
1. **Preheat the Oven**: Start by preheating your oven to 425°F (220°C). This high temperature is crucial for creating that beautiful rise in your popovers. 2. **Grease the Pan**: While the oven is heating, take your popover pan (or muffin tin if you don’t have one) and generously grease each cup with butter or oil. This will help the popovers release easily once they’re baked. 3. **Mix the Dry Ingredients**: In a medium mixing bowl, combine the flour and salt. Whisk them together until they are well blended. This step ensures that the salt is evenly distributed throughout the flour. 4. **Combine Wet Ingredients**: In another bowl, whisk together the milk and eggs until they are fully combined. You want to make sure the eggs are well beaten, as they will help create the structure of the popovers. 5. **Combine Wet and Dry Ingredients**: Gradually add the flour mixture to the milk and egg mixture. I like to do this in batches to avoid lumps. Use a whisk to mix until just combined. It’s okay if there are a few small lumps; overmixing can lead to dense popovers. 6. **Add Melted Butter**: Finally, stir in the melted butter. This adds richness and flavor to the batter. Give it one last gentle whisk to combine everything.Cooking Process
7. **Fill the Pan**: Once your batter is ready, carefully pour it into the prepared popover pan. Fill each cup about halfway full. This allows enough room for the popovers to rise without overflowing. 8. **Bake the Popovers**: Place the pan in the preheated oven and bake for 20 minutes. Do not open the oven door during this time, as the sudden drop in temperature can prevent the popovers from rising properly. 9. **Reduce Temperature**: After 20 minutes, reduce the oven temperature to 350°F (175°C) and continue baking for an additional 10-15 minutes. This step helps to cook the insides of the popovers without burning the outsides. 10. **Check for Doneness**: The popovers are done when they are golden brown and puffed up. You can gently poke one with a toothpick; if it comes out clean, they’re ready! 11. **Cool Slightly**: Once baked, remove the popover pan from the oven. Let the popovers cool in the pan for about 5 minutes. This helps them to set and makes them easier to remove. 12. **Remove from Pan**: Carefully run a knife around the edges of each popover to loosen them, then gently lift them out of the pan. Place them on a wire rack to cool slightly.Assembling and Serving
13. **Serve Warm**: Popovers are best served warm. You can enjoy them plain, or with a pat of butter, jam, or even a drizzle of honey. They also pair wonderfully with soups and stews. 14. **Storing Leftovers**: If you have any leftovers (which is rare!), store them in an airtight container at room temperature for up to a day. To reheat, place them in a preheated oven at 350°F (175°C) for about 5-10 minutes to restore their crispiness. 15. **Experiment with Flavors**: Once you’ve mastered the classic popover, feel free to experiment! You can add herbs, cheese, or spices to the batter for a unique twist. Just remember to keep the ratios the same for the best results. 16. **Enjoy the Process**: Making popovers is a fun and rewarding experience. Don’t be discouraged if they don’t turn out perfect the first time. Each attempt is a learning opportunity, and soon you’ll be a popover pro! Now that you have the complete recipe, I hope you enjoy making these delightful popovers as much as I do! They’re a fantastic addition to any meal and are sure to impress your family and friends. Happy baking!
Conclusion:
In summary, this Classic Homemade Popovers recipe is an absolute must-try for anyone looking to elevate their baking game. The delightful combination of a crispy exterior and a light, airy interior makes these popovers a perfect addition to any meal, whether you’re serving them alongside a hearty soup, a fresh salad, or even as a unique breakfast treat with a drizzle of honey or a dollop of jam. One of the best things about popovers is their versatility. You can easily experiment with different flavors by adding herbs, cheese, or even spices to the batter. Imagine the savory goodness of cheddar and chive popovers or the sweet touch of cinnamon and sugar for a breakfast twist! The possibilities are endless, and I encourage you to get creative with your own variations. I truly believe that once you try making these Classic Homemade Popovers, you’ll be hooked. They are not only simple to prepare but also impressively delicious, making them a fantastic choice for gatherings or a cozy family dinner. So, roll up your sleeves, gather your ingredients, and give this recipe a go! I would love to hear about your experience, so don’t forget to share your thoughts and any variations you come up with. Happy baking! Print
Classic Homemade Popovers: A Simple Recipe for Perfectly Fluffy Treats
- Total Time: 15 minutes
- Yield: 12 popovers 1x
Description
Enjoy the light and fluffy texture of homemade popovers, perfect for breakfast, brunch, or as a delightful side dish. With a simple mix of flour, milk, and eggs, these golden treats are easy to make and sure to impress your family and friends. Serve them warm with butter, jam, or alongside your favorite soups and stews for a delicious addition to any meal.
Ingredients
- 1 cup all-purpose flour
- 1 cup milk
- 3 large eggs
- 1/2 teaspoon salt
- 2 tablespoons unsalted butter, melted
- Extra butter or oil for greasing the popover pan
Instructions
- Preheat your oven to 425°F (220°C).
- Generously grease each cup of your popover pan (or muffin tin) with butter or oil.
- In a medium bowl, whisk together the flour and salt until well blended.
- In another bowl, whisk together the milk and eggs until fully combined.
- Gradually add the flour mixture to the milk and egg mixture, whisking until just combined. A few small lumps are okay.
- Stir in the melted butter and whisk gently to combine.
- Pour the batter into the prepared popover pan, filling each cup about halfway.
- Bake in the preheated oven for 20 minutes without opening the door.
- After 20 minutes, reduce the oven temperature to 350°F (175°C) and continue baking for an additional 10-15 minutes.
- The popovers are done when golden brown and puffed up. A toothpick should come out clean when poked.
- Remove the pan from the oven and let the popovers cool in the pan for about 5 minutes.
- Run a knife around the edges to loosen, then gently lift them out and place on a wire rack.
- Enjoy warm, plain, or with butter, jam, or honey. They pair well with soups and stews.
- Store any leftovers in an airtight container at room temperature for up to a day. Reheat in a preheated oven at 350°F (175°C) for 5-10 minutes.
- Feel free to add herbs, cheese, or spices to the batter for a unique twist.
- Don’t be discouraged by initial attempts; each batch is a learning opportunity!
Notes
- Ensure your oven is fully preheated before baking to achieve the best rise.
- Avoid opening the oven door during the first 20 minutes of baking to maintain temperature.
- Experiment with different flavors and ingredients once you master the basic recipe.
- Prep Time: 15 minutes
- Cook Time: 30-35 minutes


Leave a Comment